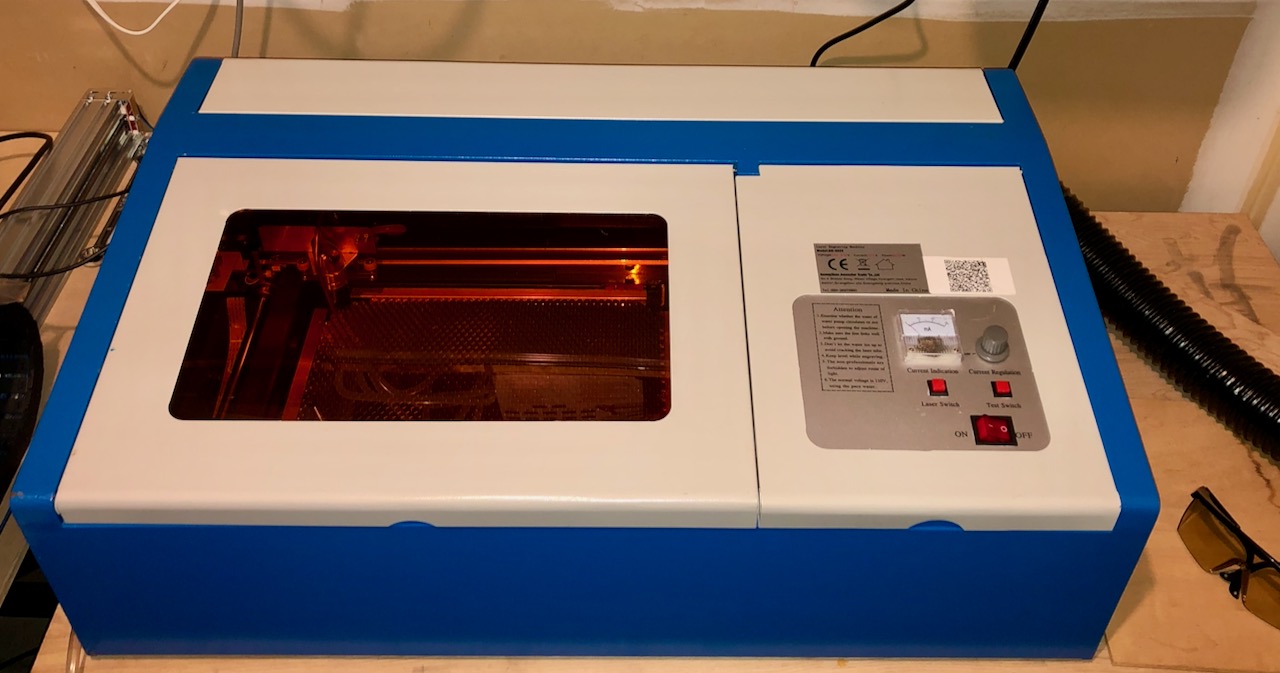
K40 Laser Cutter Upgrades
The K40 is a 40 watt CO2 laser system that is commonly available on eBay. There are a lot of variations with the K40 but most have similar components. It is a basic limited feature machine usable for cutting or engraving thin plastic or wood.
Below is an example of what a cut looks like from 2mm plastic panels. In this case I cut two simple 20mm squares to test the calibration. The edges are very clear compared to using other tools. The laser is able to cut this depth in a single pass at a slow speed (10mm/s).
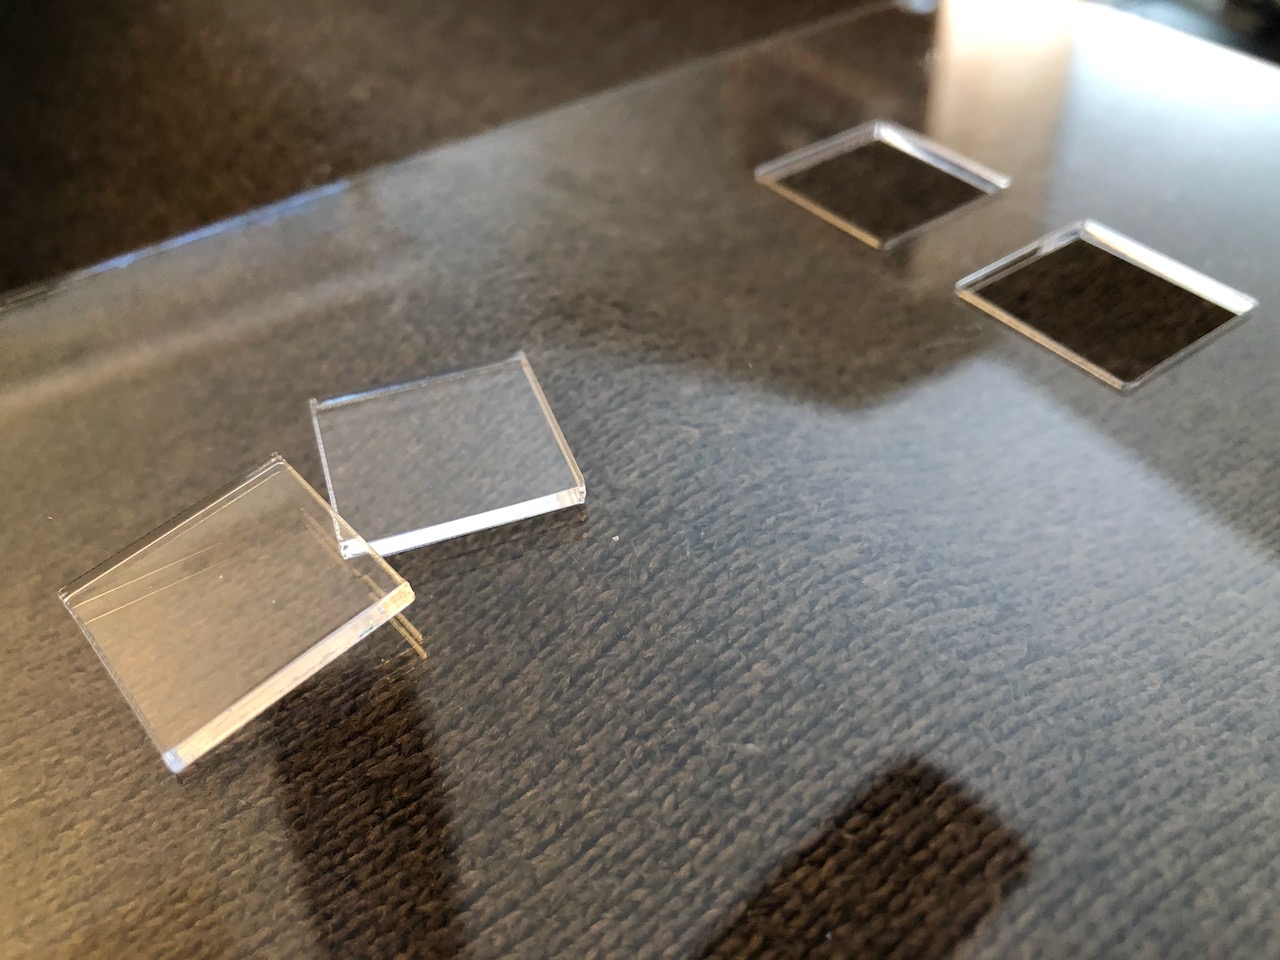
It is also possible to do raster images with variable power. Raster image mode allows engraving an image onto the material. This is often used for text, photos or vector artwork engraving.
Note: Before using a material the laser it is important to know the properties of the material. Some materials produce toxic gas with the laser. The following guide is good resource for material recommendations.
Modifications
The original plan was to upgrade the electronics and add air assist. That expanded to include a z-table, improved blower and several other changes. In order to improve the functionality I made several modifications.
- Updated controller board
- Power supply for new controller
- Air assist for clearing smoke and vapors
- Z Table adjustable platform with larger work area
- Blower and fume extraction enhancements
- Quick disconnects for air and water lines
- Focus lens and mirror upgrades to higher quality
- New internal panel separating electronics section
- Sealed gaps and holes to improve fume extraction
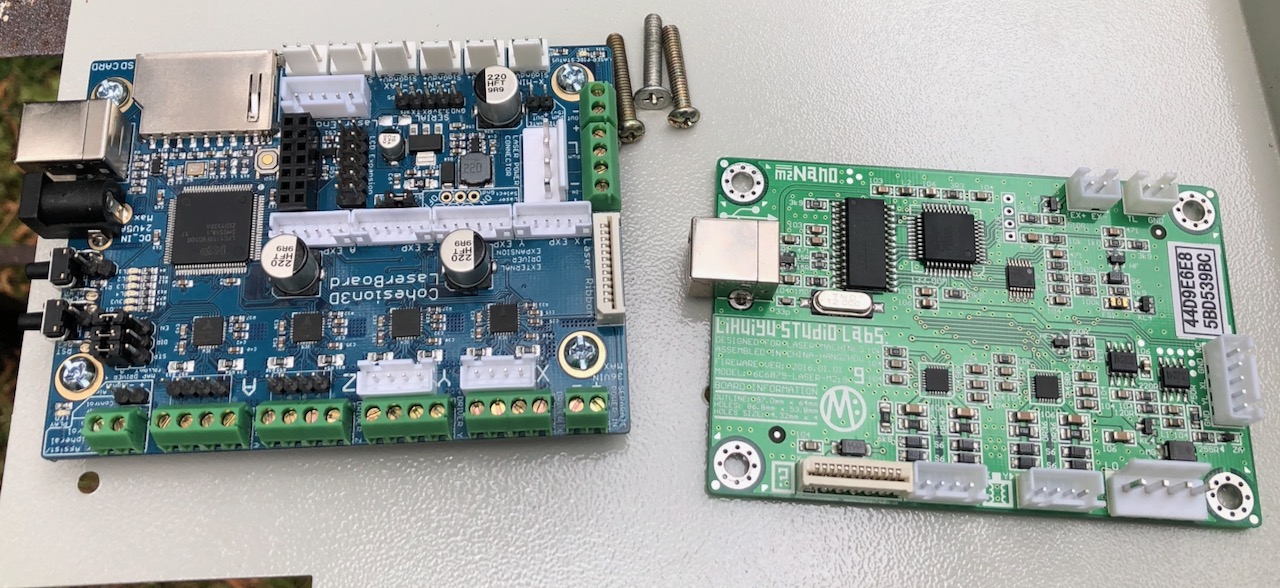
Controller Board
The K40 came with the M2 nano board. It is more common in the recent models.
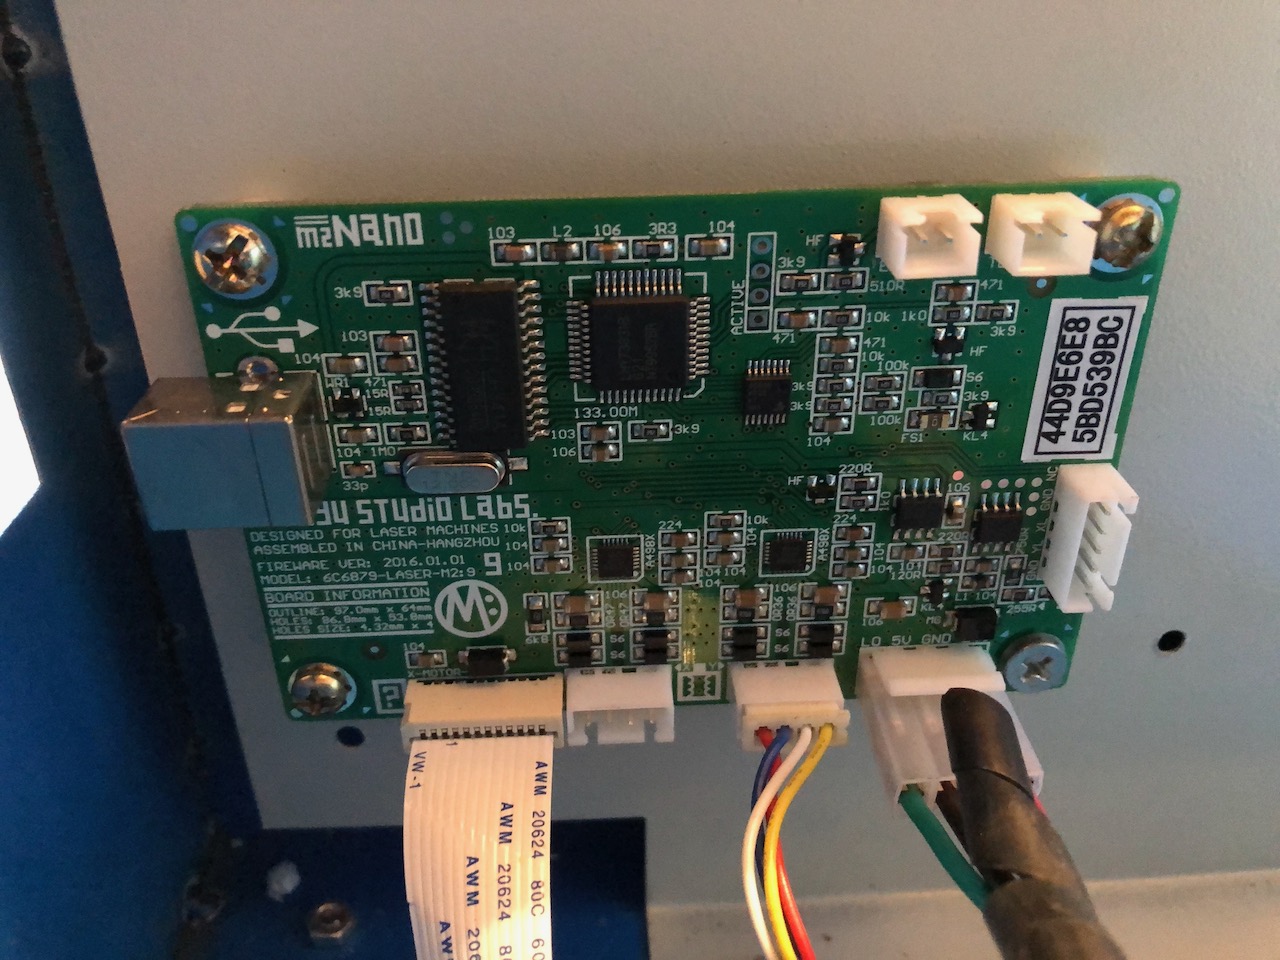
The disadvantage of the board is that it only works with the software included which is very old and has limited functionality. The software is also locked and requires a USB key installed while operating it.
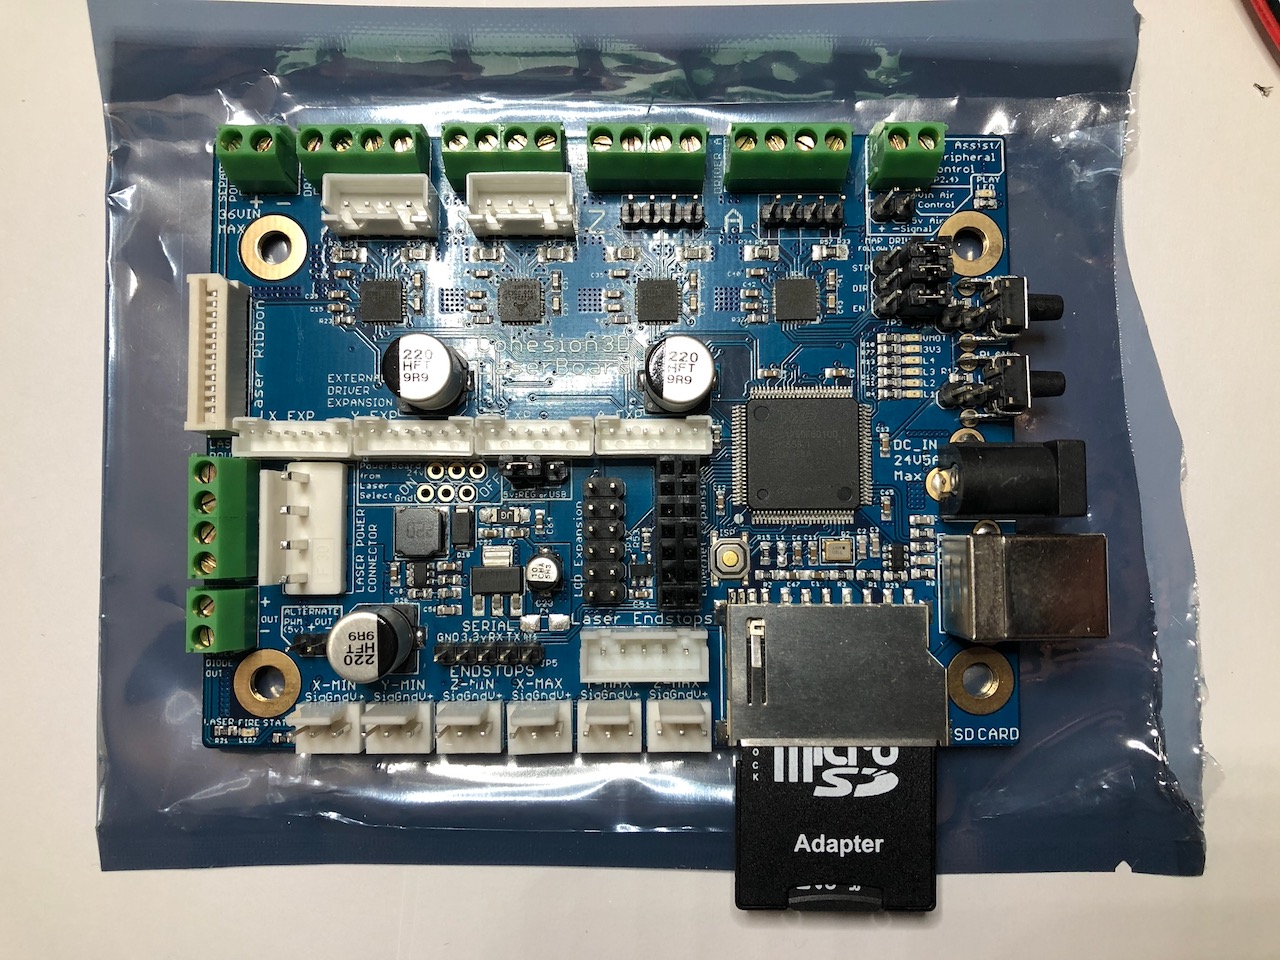
After searching and reading reviews and specs on various boards I found the Cohesion3D LaserBoard that is based on the Smoothieboard design. The board is awesome and has all the connections needed to be a drop in replacement for the M2 nano board that came with the K40 originally. This makes the installation significantly easier. Especially since it works with the K40 variant that I have that uses a ribbon cable for the X axis motor and homing switches.
There are other options for controller boards including boards that have adapters for the stock connections. I think the LaserBoard is the best overall.
The biggest advantage is being able to use any software that can download G-Code to the board. There are some other advantages, too. Such as the ability to add many other options including a rotary setup. The LaserBoard also supports the addition of a Z axis table.
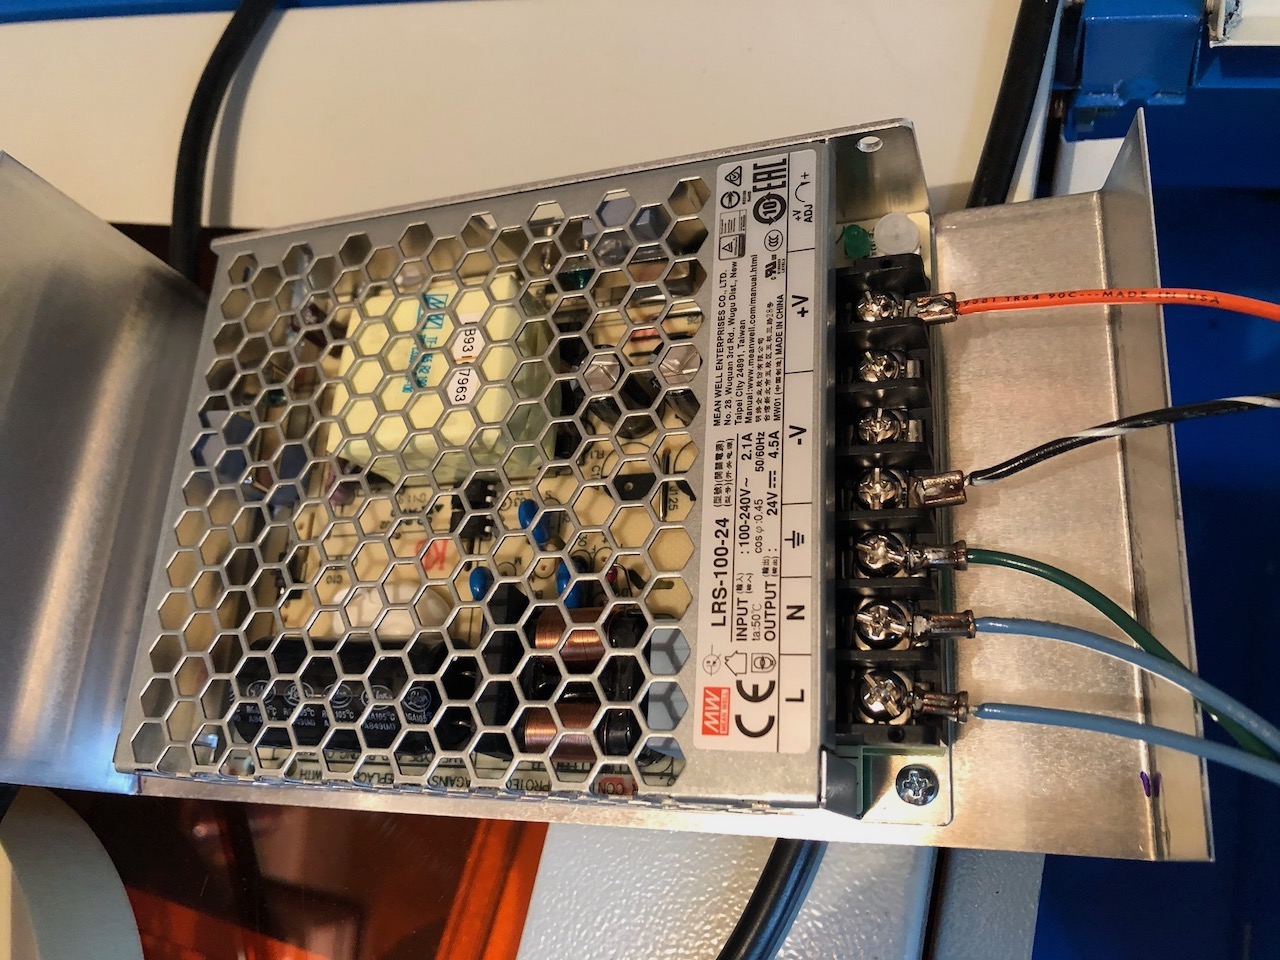
Power Supply for the New Controller
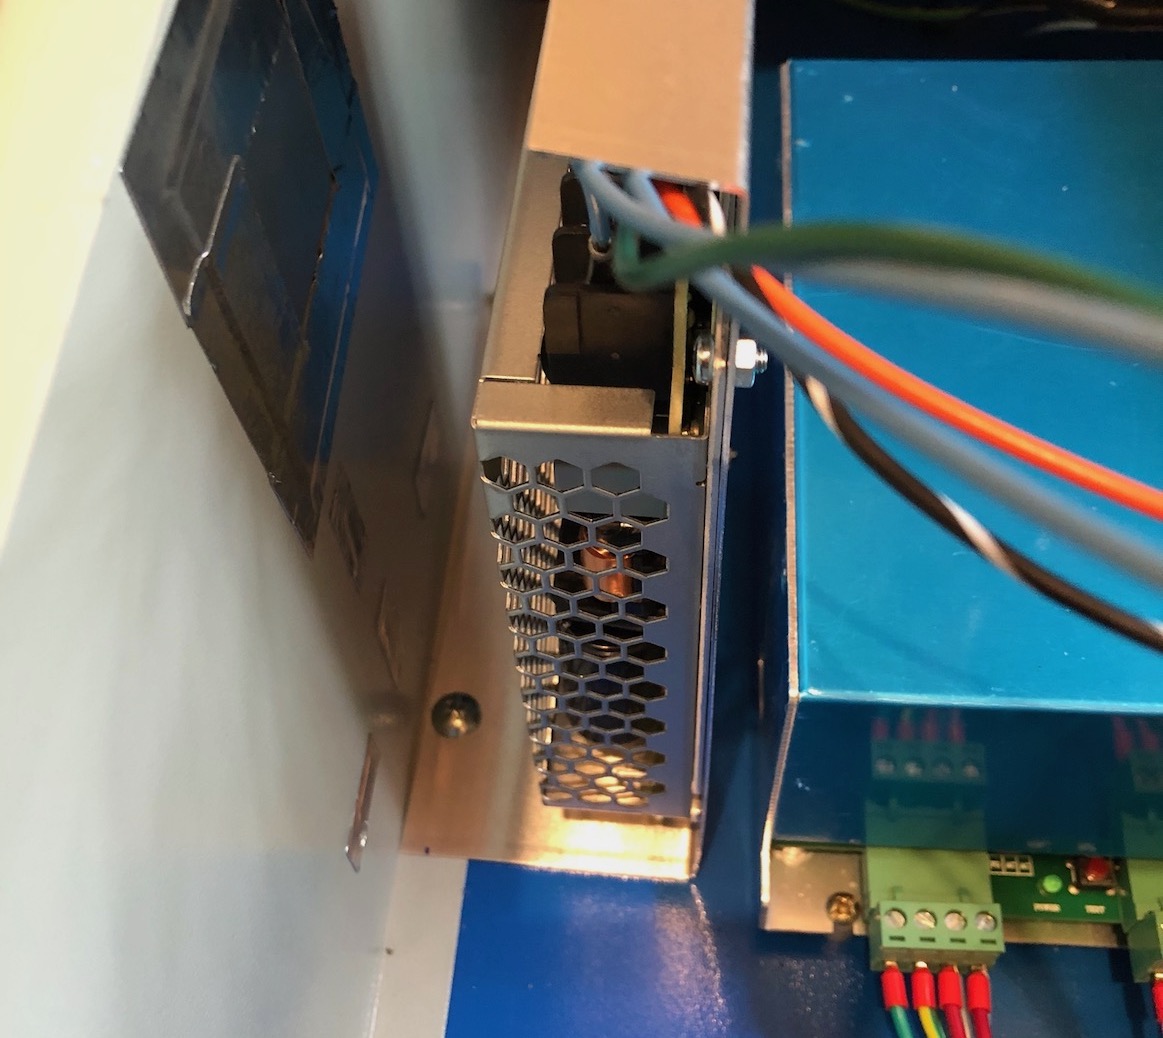
The one thing I didn’t like about the Cohesion3d LaserBoard is that it uses an external 24V power supply. It does have terminals to provide power directly to the board. They recommend against pulling power from the stock power supply in the K40. So I added a 24V switching power supply I purchased from Mouser Electronics. I just connected it to the AC input on the stock power supply. I made a simple aluminum bracket to mount it next to the K40 power supply.
I made a simple bracket from an aluminum sheet. It has a 90 degree bend and holes punched for screws.
New Software
Before replacing the controller I was using the stock software. It comes with a keyed version of Corel Draw and an application to operate the K40. It requires having the USB key installed. The software was old and not very easy to use.
I first tried out K40 Whisperer web site. It is very good software and if I kept the original M2 Nano this would be the software I would use.
After changing to the Cohesion3D LaserBoard I changed software to LightBurn LightBurn is an all-in-one application that has the capability for creating drawings as well as operating the laser cutter. LightBurn can import drawings in many formats. The most useful for me are SVG and DXF. This allows creating artwork in Inkscape, Fusion 360 or FreeCAD.
Air Assist
The K40 is a very basic laser cutter that doesn’t have an air assist. An air assist is an air pump connection that blows a light stream of air at the focal point area where the laser burns material. The purpose is to clean any fumes or smoke so that the laser has a clear path to the material.
There are a lot of options for adding an air assist. Most of them involve replacing the stock assembly that holds the focusing laser with one that has a nozzle to attach an air hose.
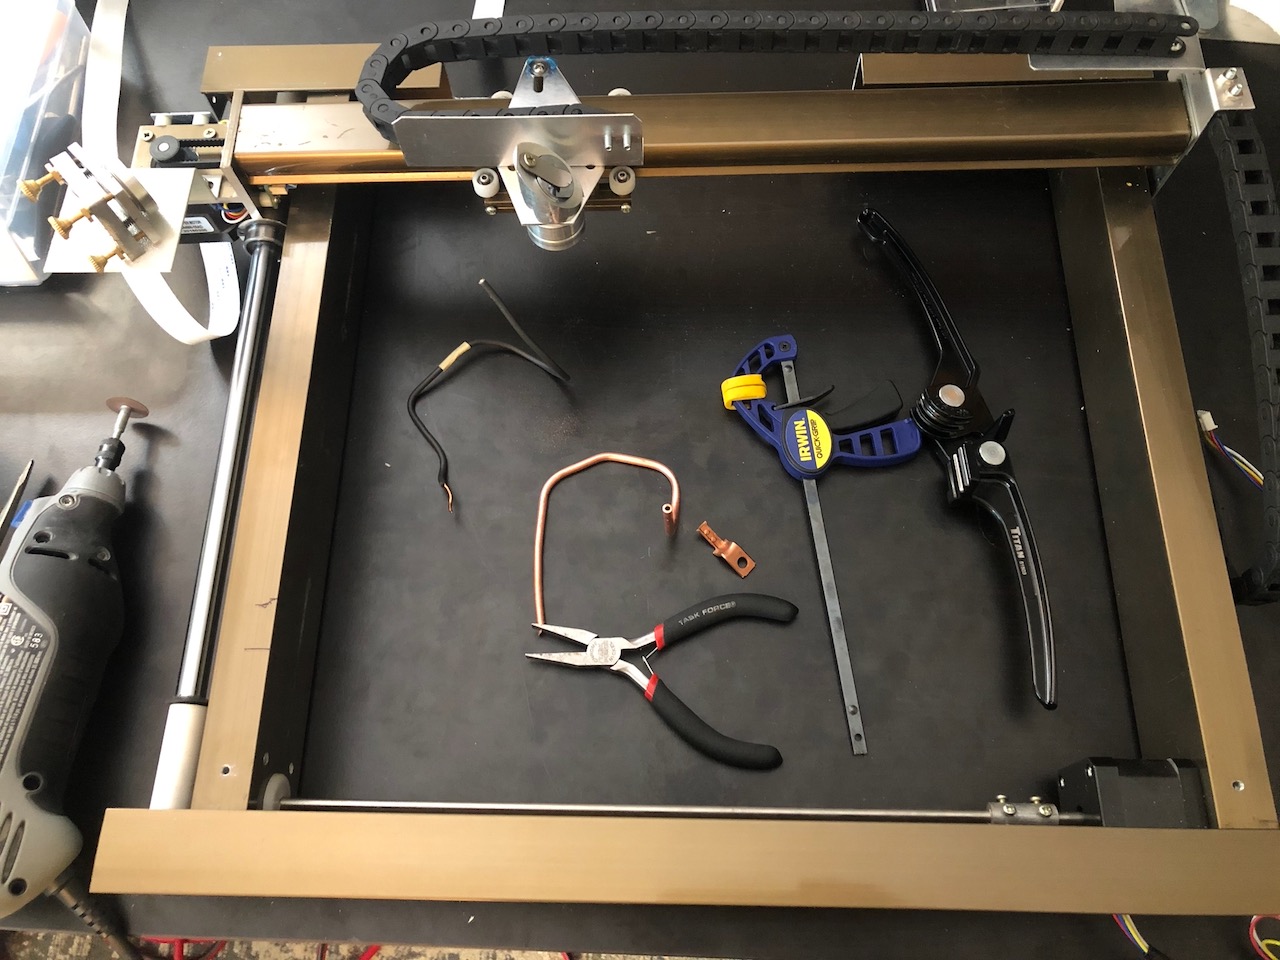
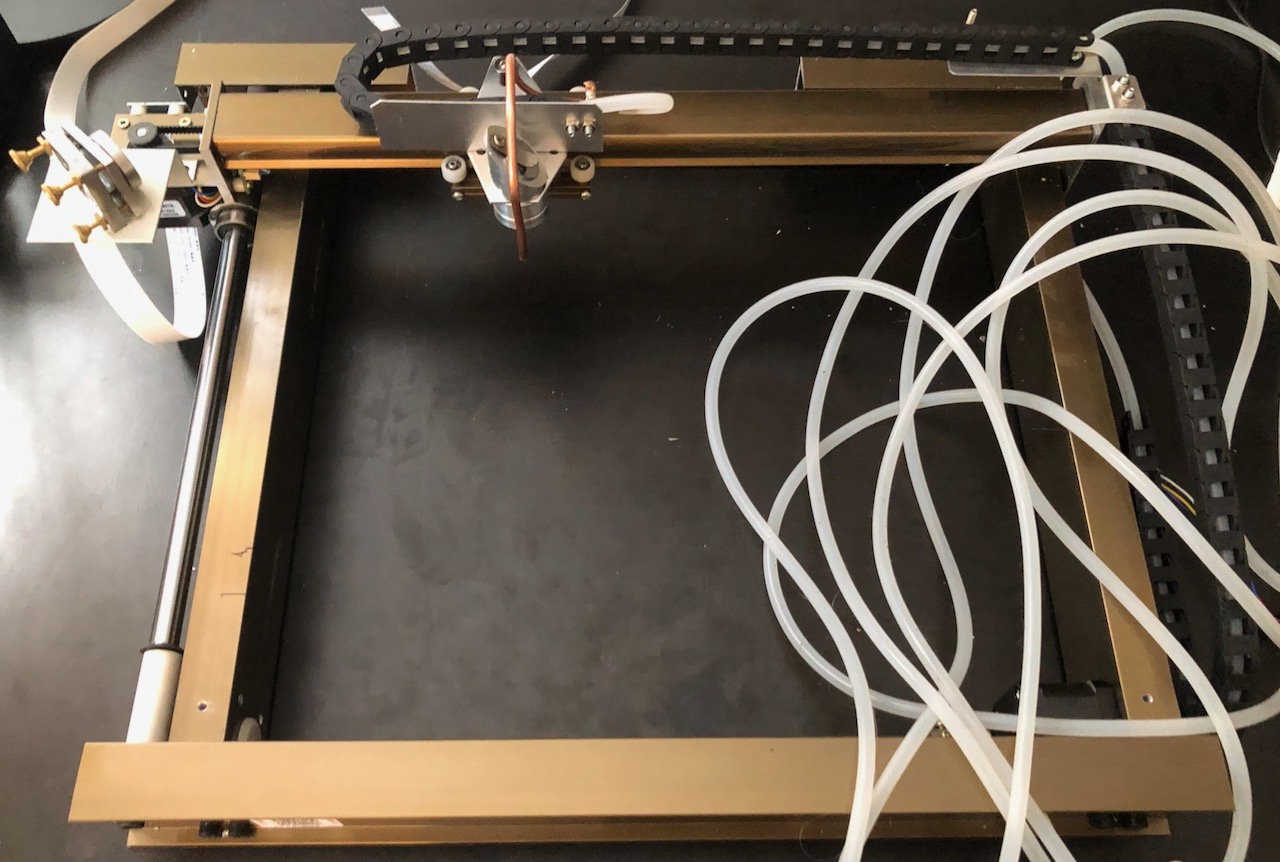
I decided to make an air tube from copper tubing that points in the direction of the focal point to deliver air assist. I used the following items to make it:
- Drag chain
- Tubing to attach the copper tubing to the air inlet
- Copper tubing
- Quick disconnect for air inlet
- Brackets for drag chains
- Tubing bender
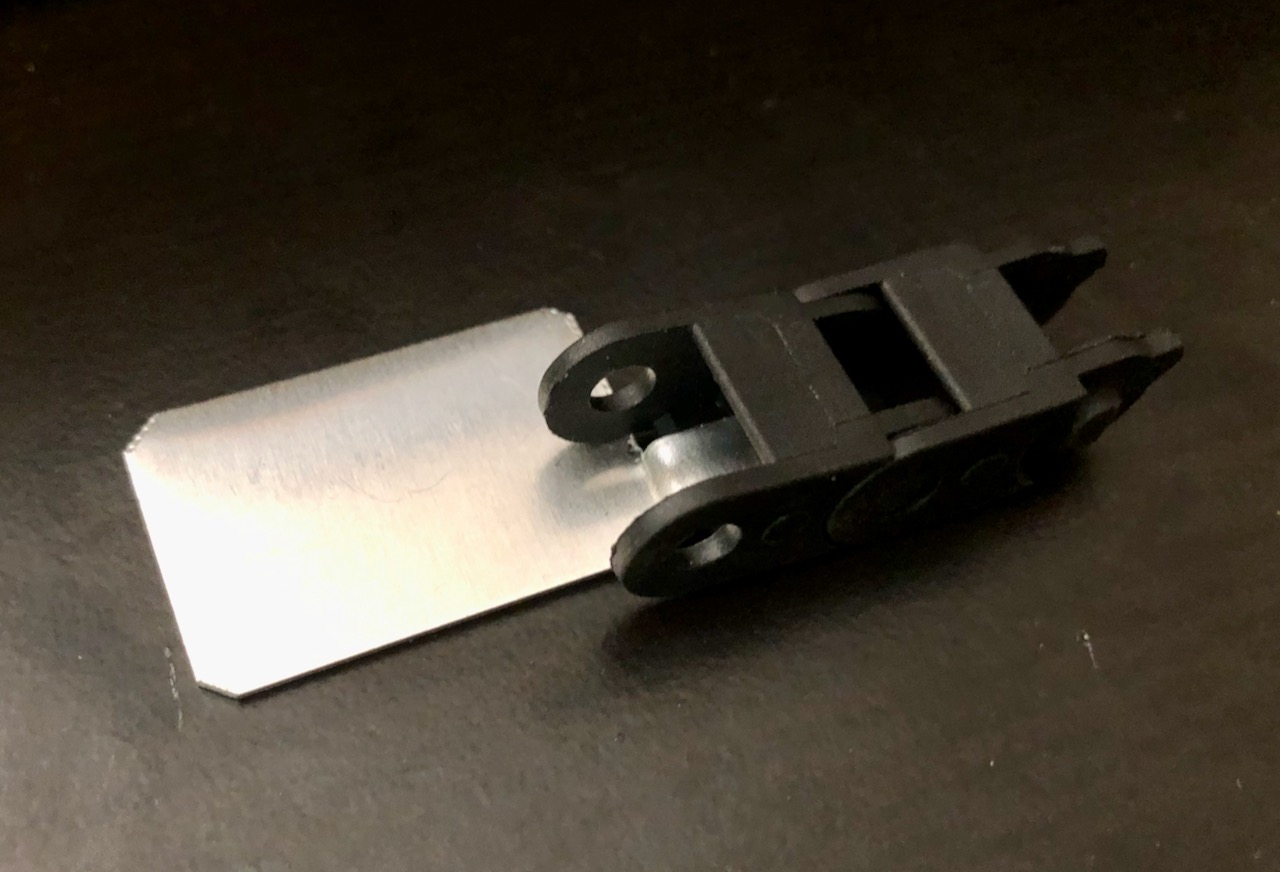
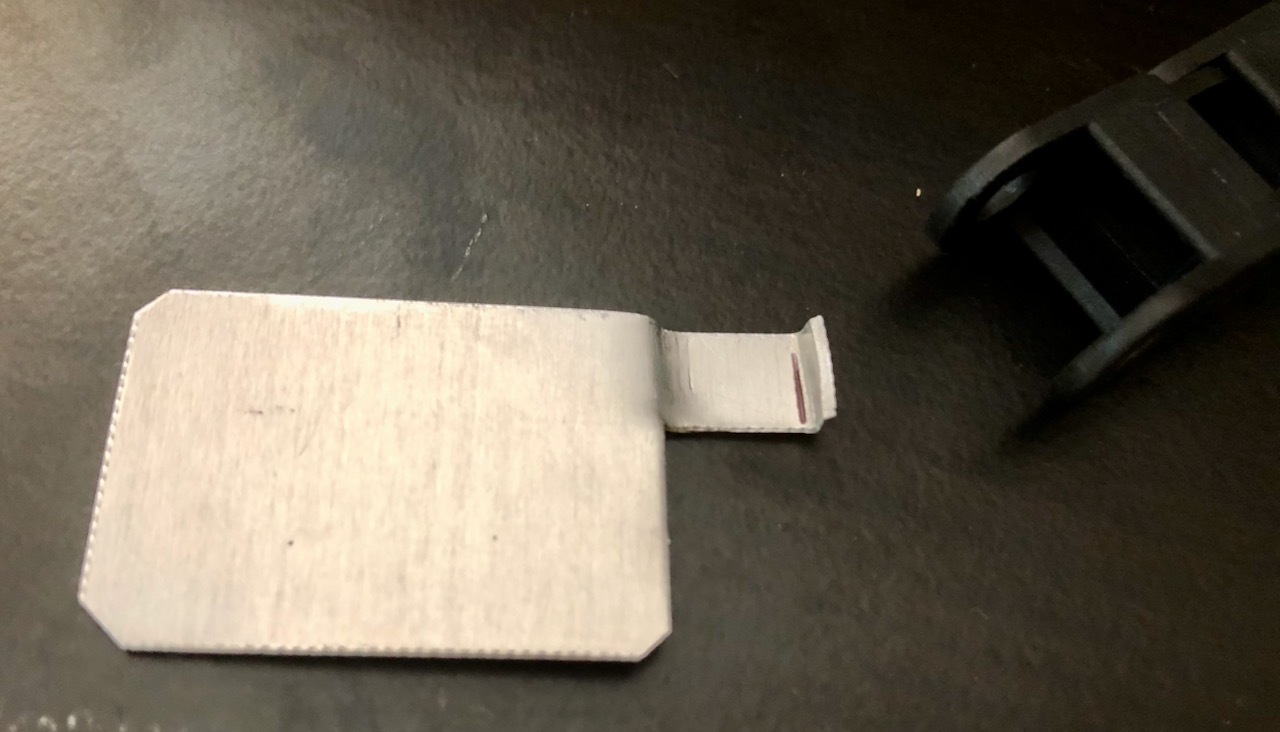
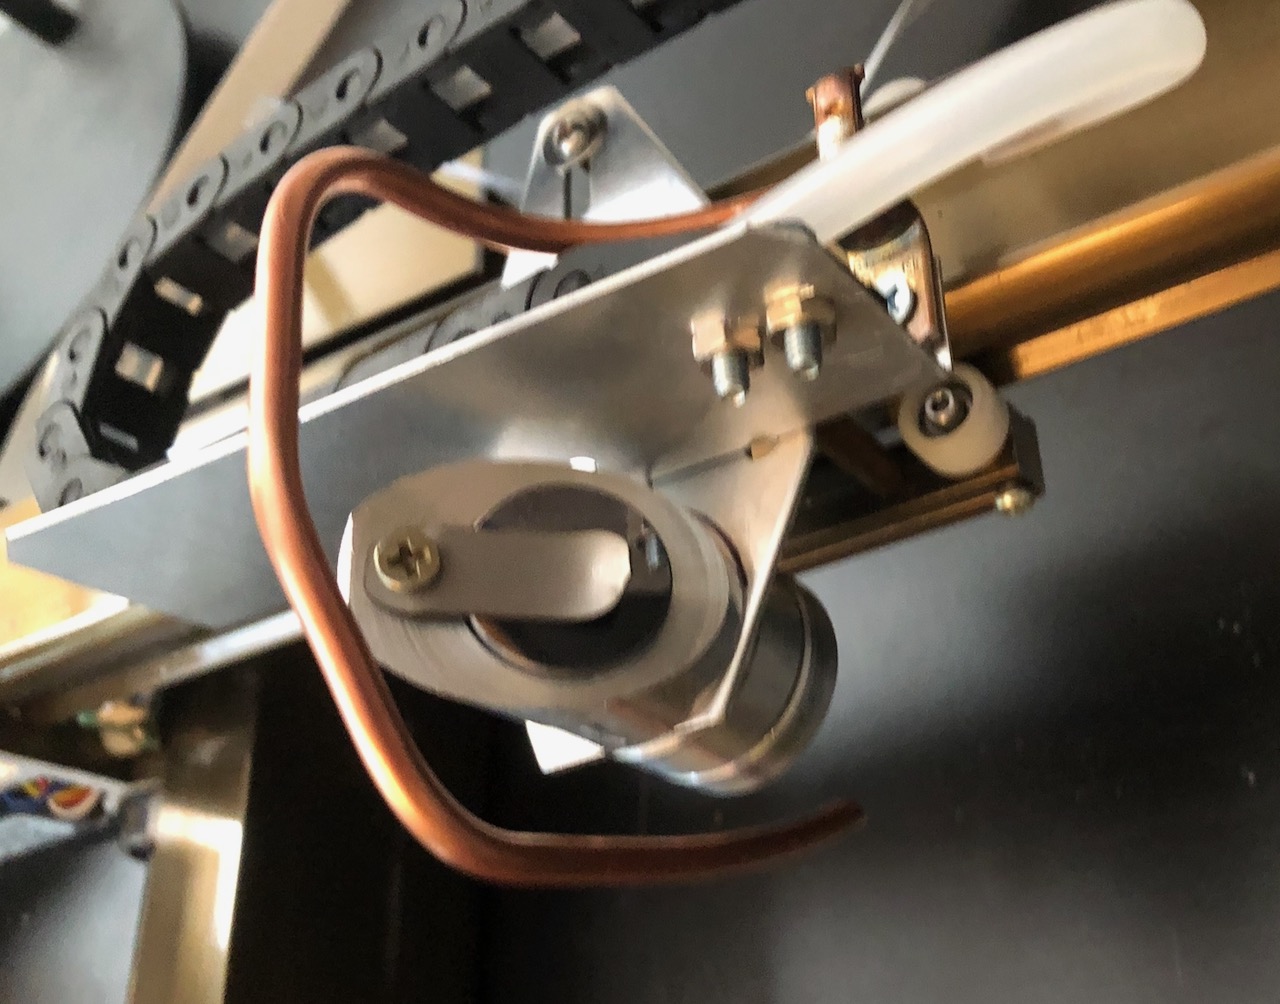
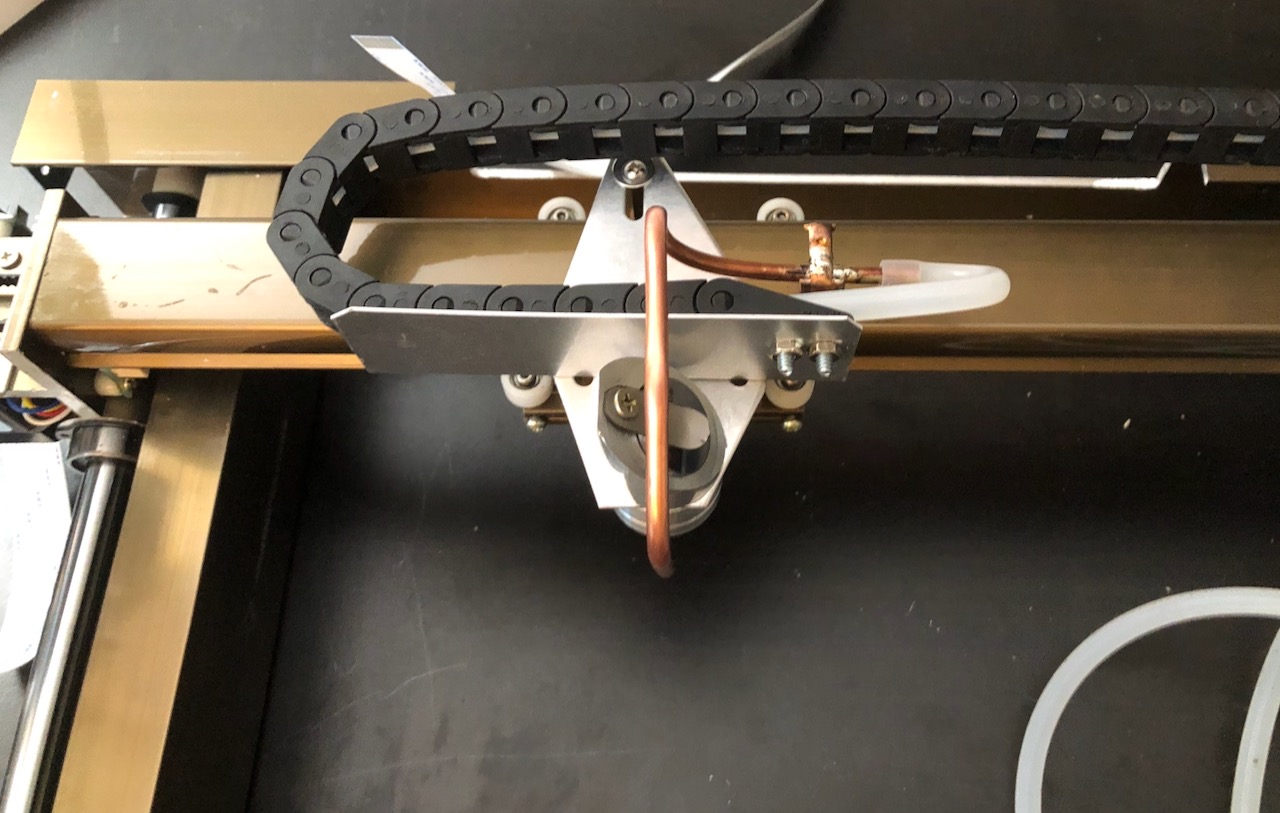
I split the drag chain into to parts. One for the X axis and the other for the Y axis. The X axis attaches with two aluminum brackets I made using K&S Precision Metals 0.032” Aluminum Sheet. These sheets are ideal for making brackets. I have a small sheet metal brake that easily bends and cuts them. It is also very easy to cut them with hand sheers (aviation snips or tin snips) and bend them with pliers. And it is simple to punch holes using a hand punch. I have used this setup for a lot of projects.
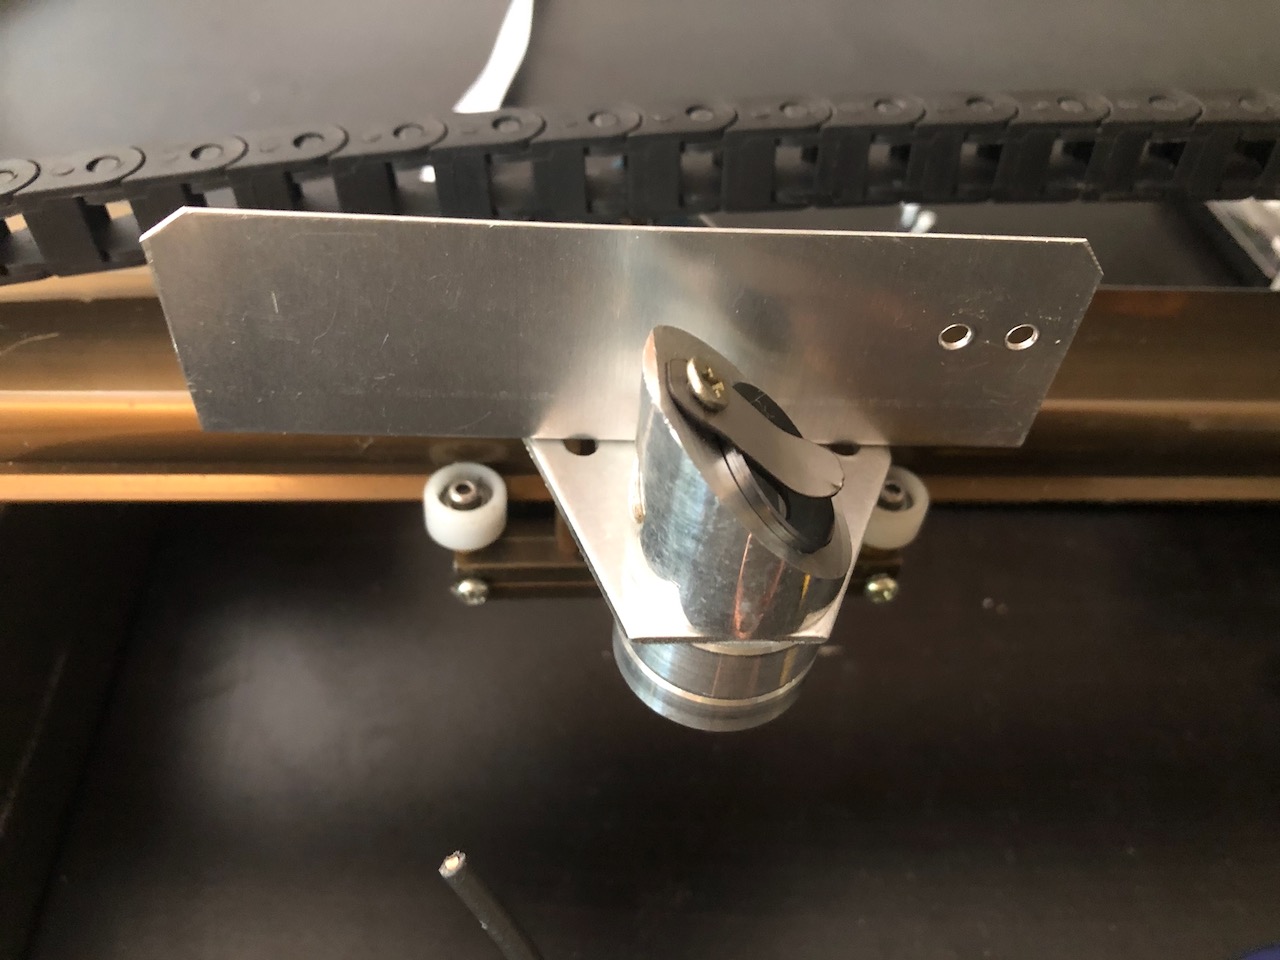
The bracket on the laser head attaches using the existing screws for the laser head bracket. The two holes on the front are where the drag chain attaches. It is wider than the laser head to keep the drag chain from getting in the area of the laser beam.
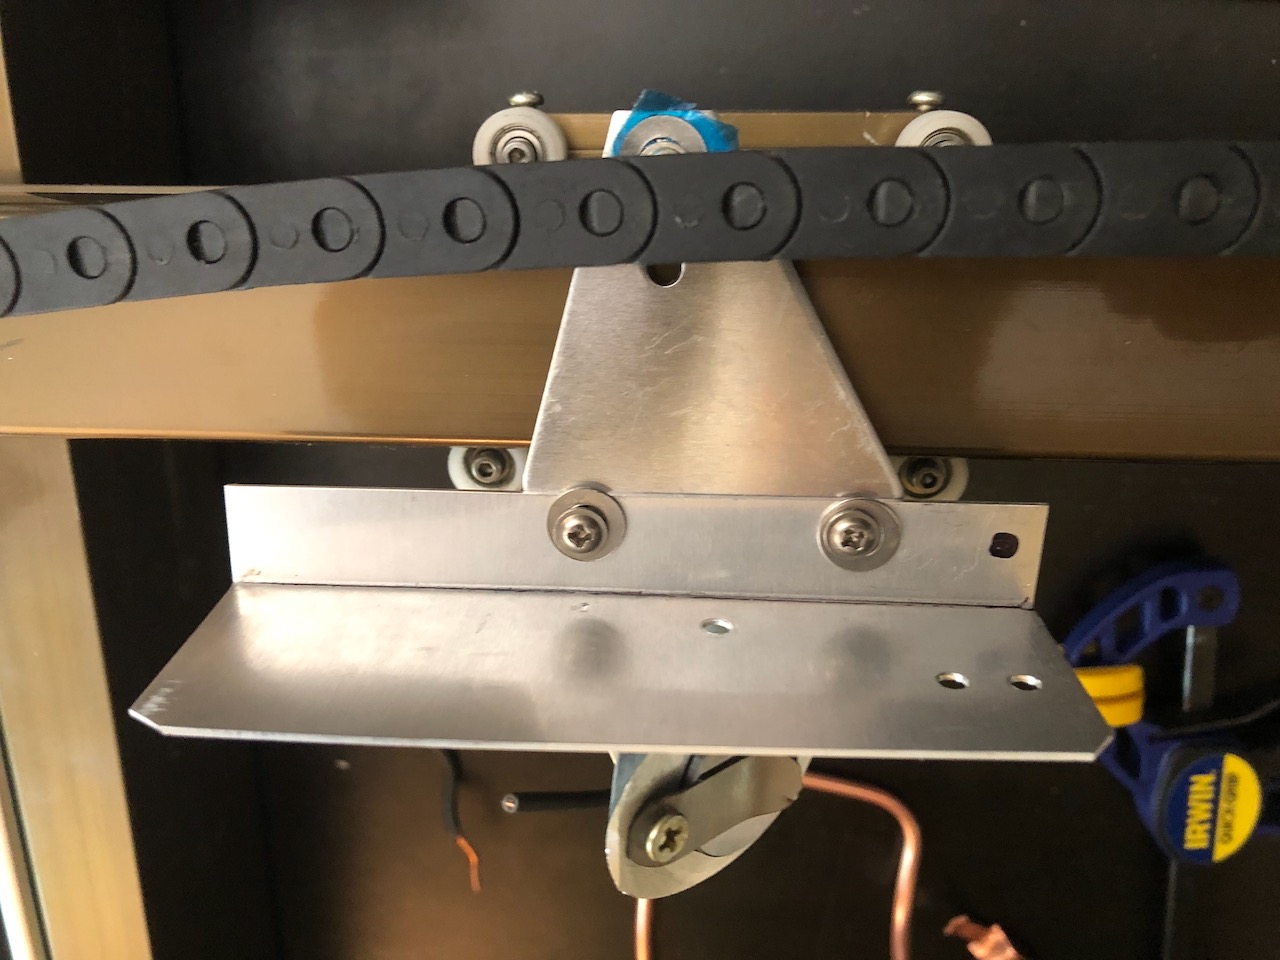
The Y axis drag chain connects to a bracket that uses the existing screws for the X axis gantry. The other end uses a small hold down tab.
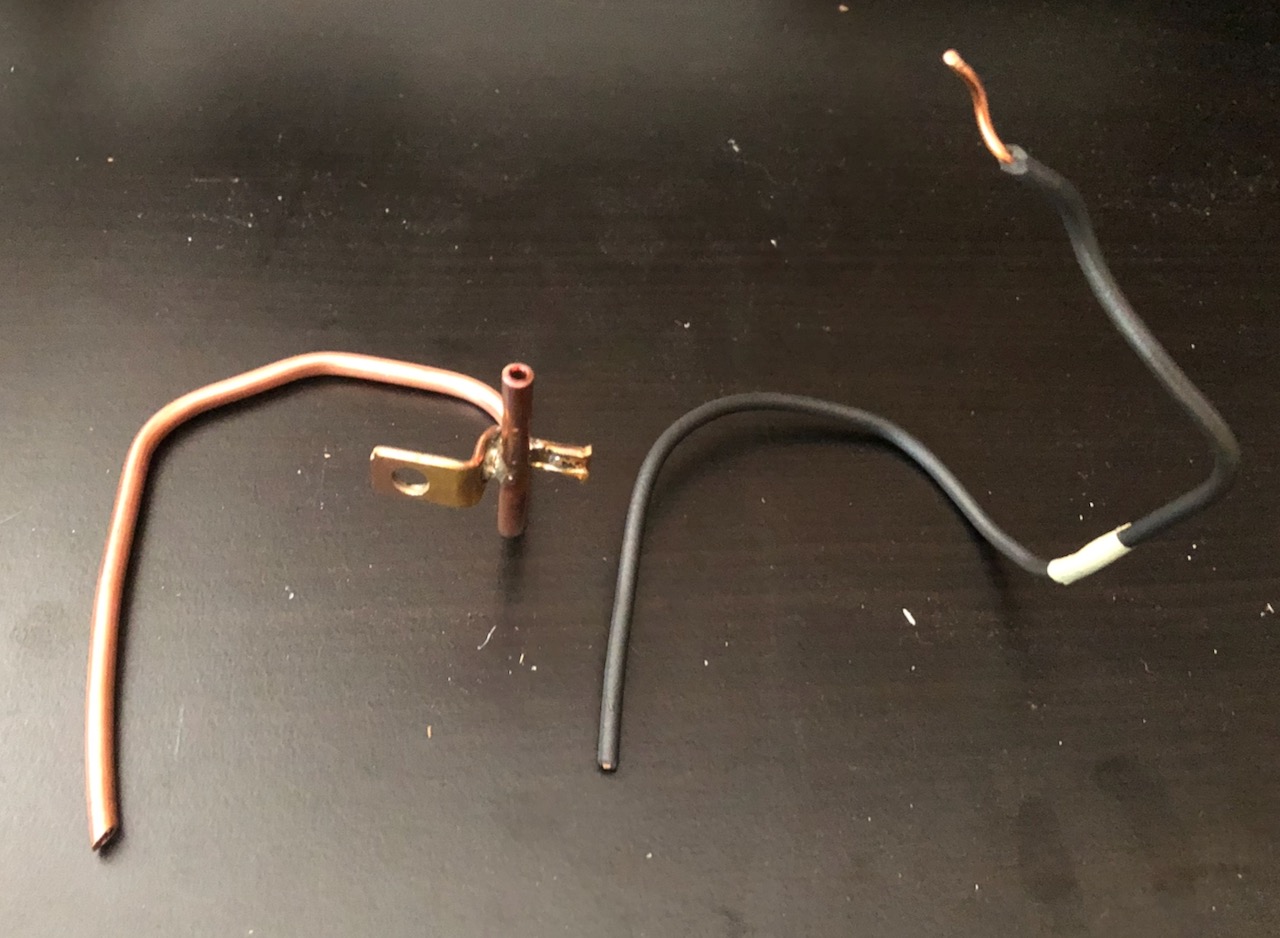
Making the copper tubing was a little more challenging than I expected. I used a copper wire to model the shape so that it was easier to get the bends right. The copper is soft enough to bend by hand. But the tubing bender gives cleaner bends and prevents kinking the tubing. I soldered a copper bracket that came from some electrical connectors. The reason I chose copper was to be able to solder it. However the tubing wouldn’t heat very well with my soldering iron. So I used a plumbers torch.
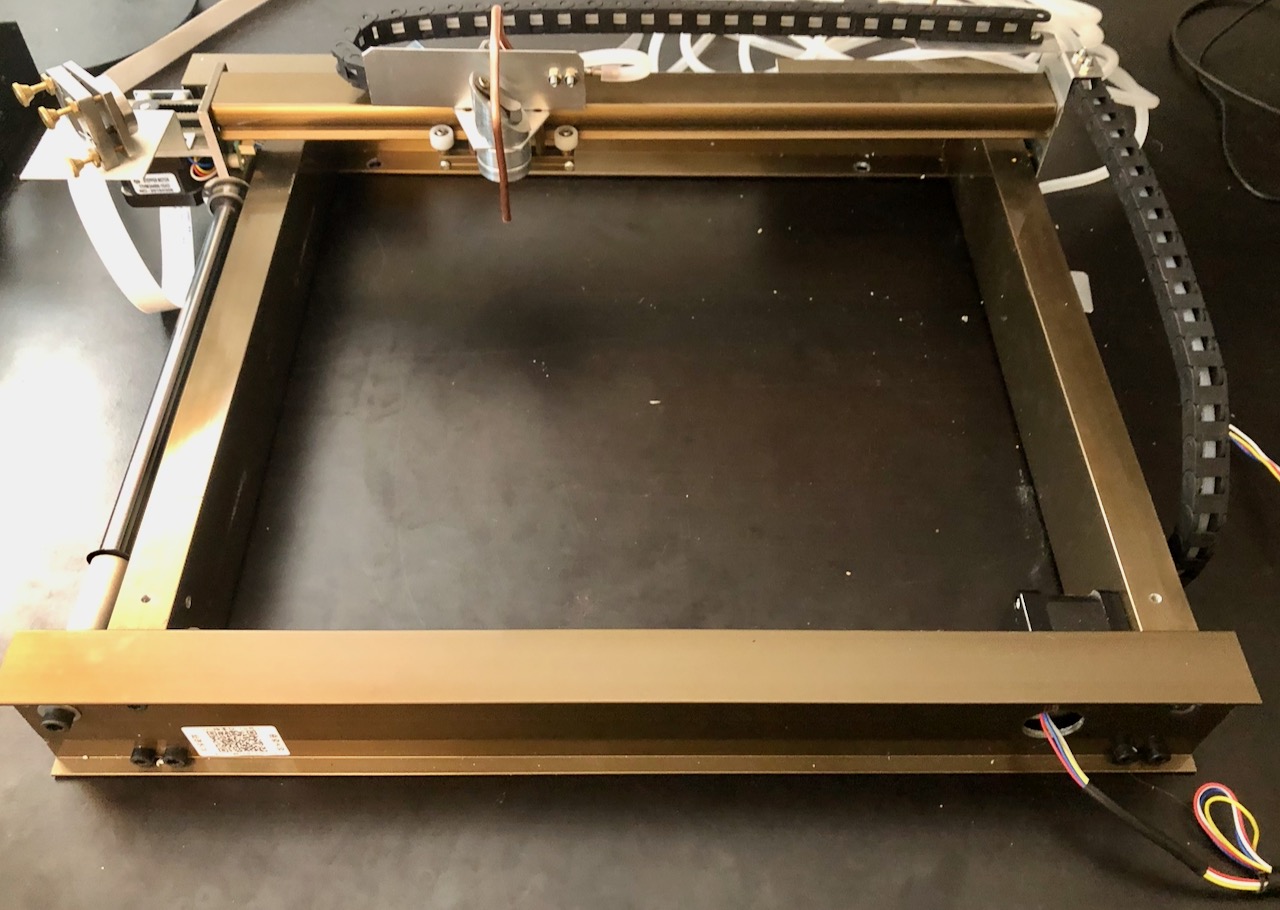
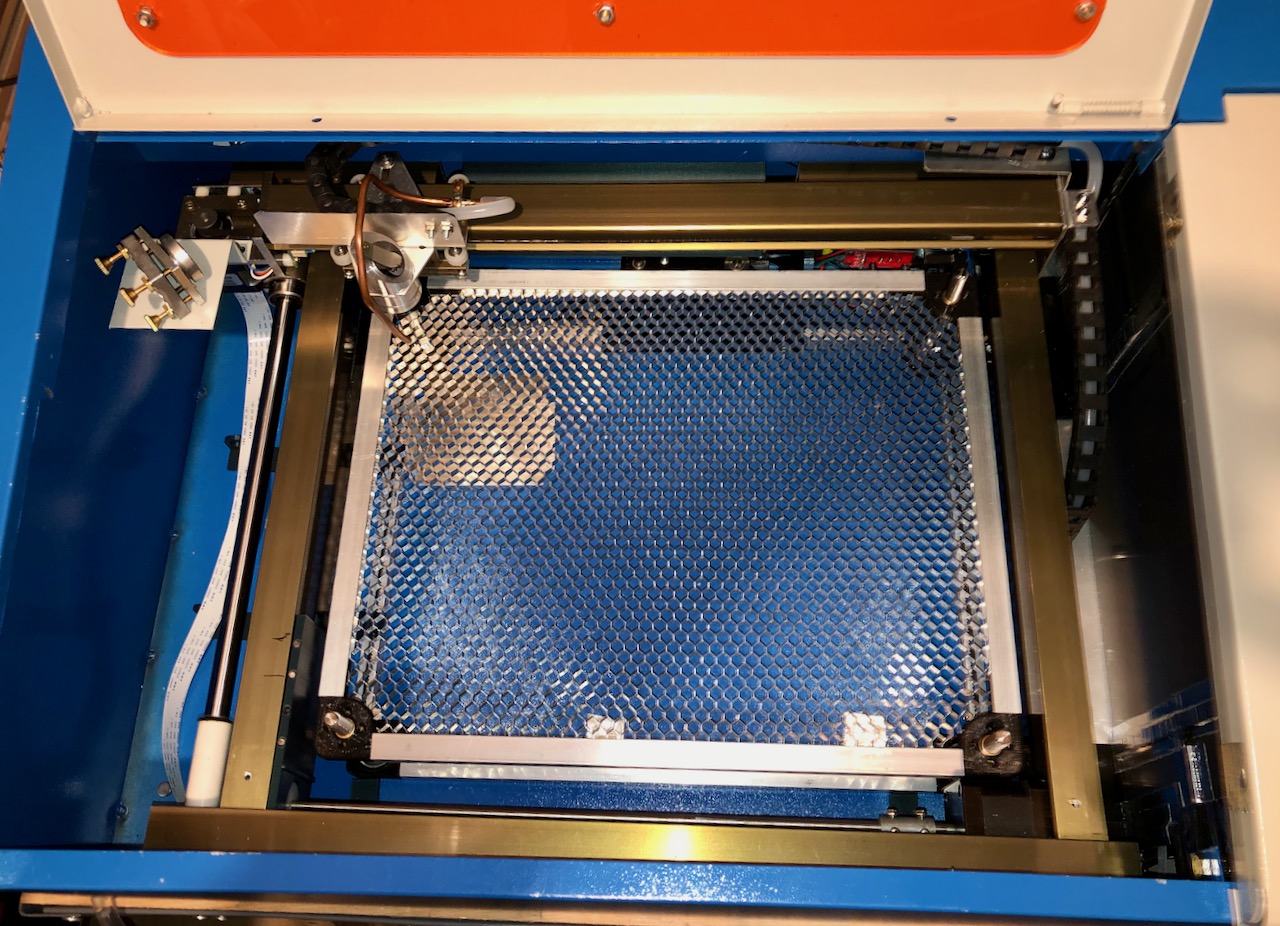
Motorized Z Axis Table
After seeing a few 3D printed designs for Z Tables, I decided to make my own. I had some aluminum channel for 1/4” plywood that I thought would make good rails.
The original table is an aluminum panel with a small opening and work clamp. When I used it to cut plastic panels, I just laid the plastic on top. I know that changes the focus point but it seemed to work OK.

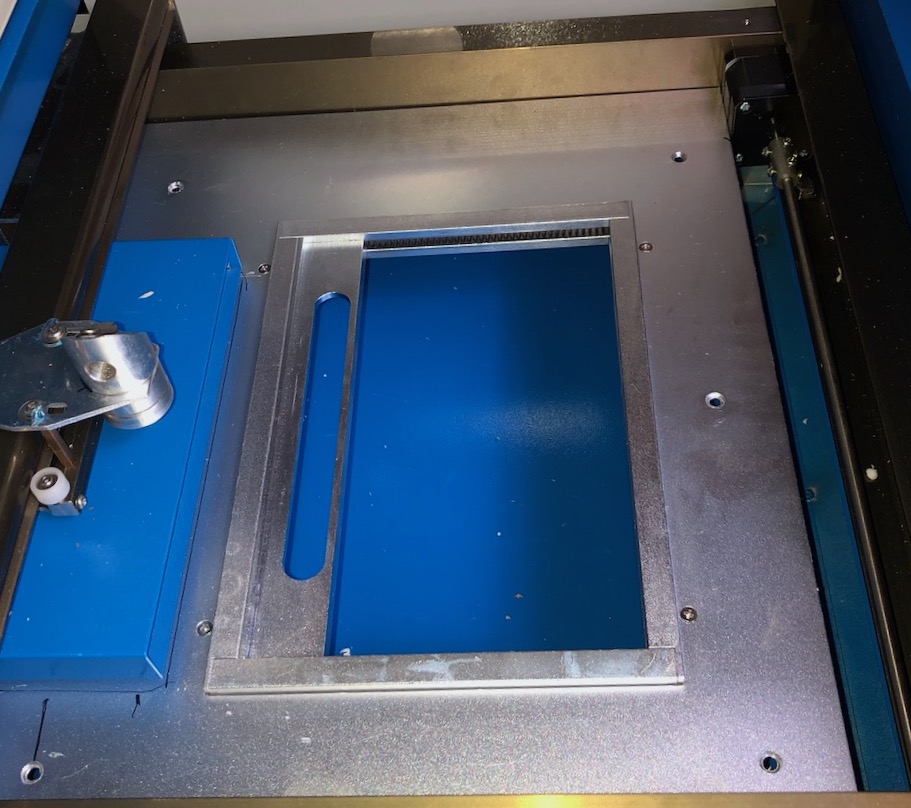
This part of the project took a lot of time. I will be describing it in another article. In that article I will also be providing the files I created to make the 3d printed parts. The following is what the new table looks like in the machine.
Redesigned Blower and Exhaust
The blower that comes with the K40 does a very poor job of extracting the fumes or smoke. There are several problems with it. The main issue are the blower isn’t very powerful and doesn’t attach to the K40 well. Even after closing all of the areas with gaps it still wouldn’t pull fumes from the machine very well.
The blower attaches to the back of the fume extractor. It is the part on the inside that vacuums the fumes from the laser work area. One issue with this part is that it extends fairly far into the work area.
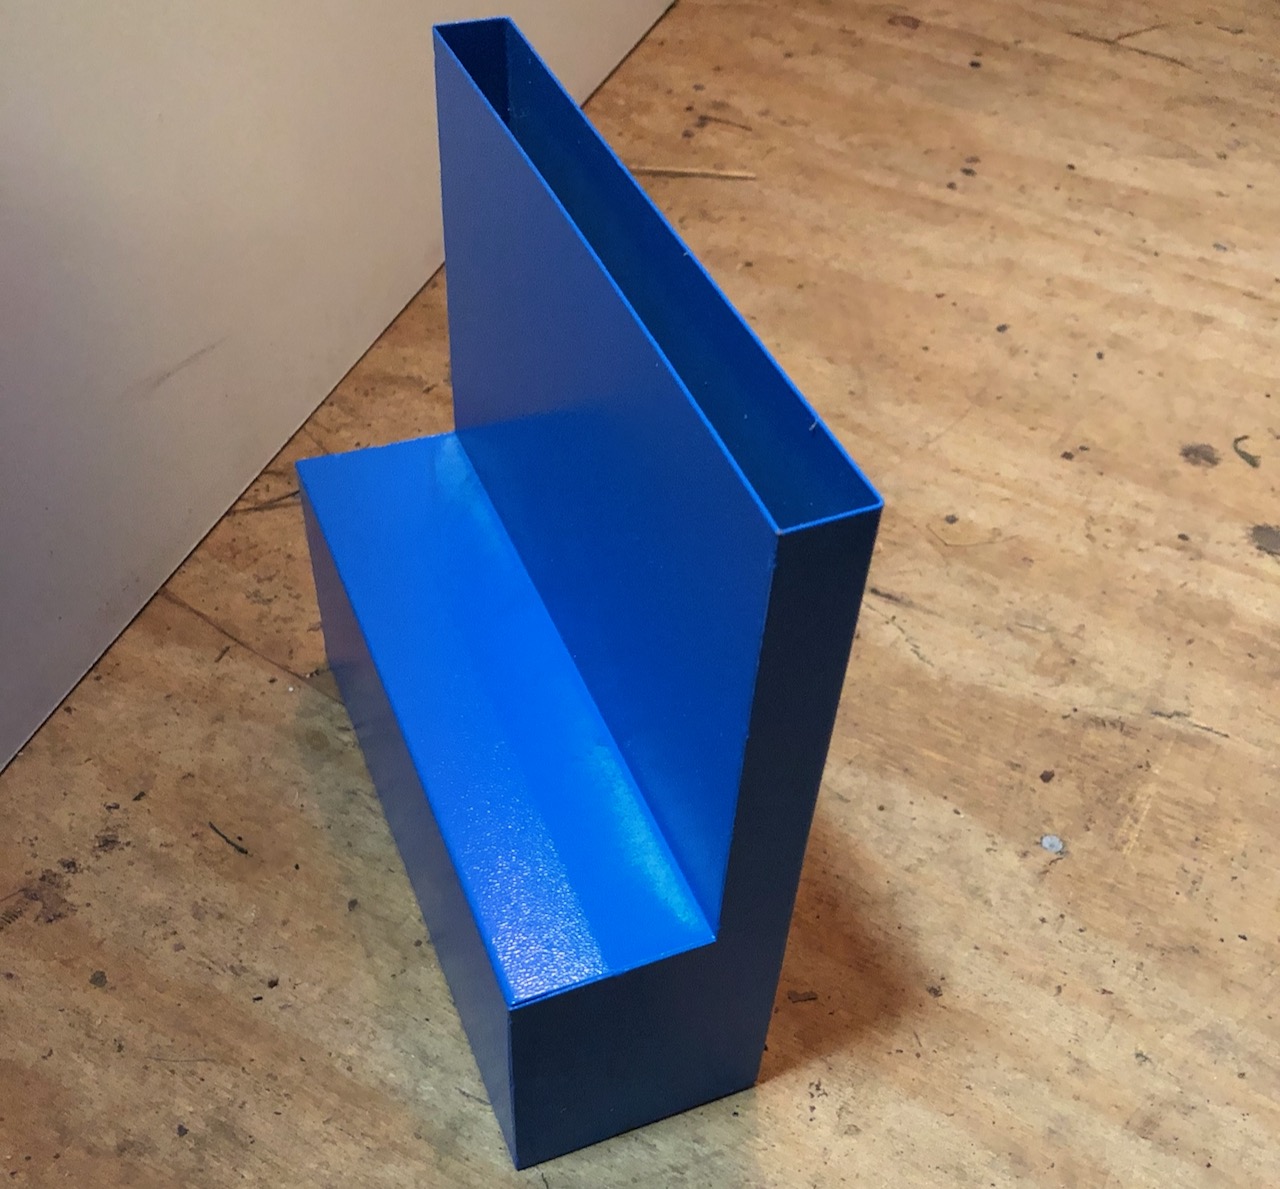
The old design required almost complete disassembly of the machine to remove. Most people opt to use a Dremel tool to cut the stock fume extractor so that it doesn’t extend into the work area as much. And that prevents taking the laser gantry out. I decided that since I was making so many changes and the gantry had to be removed anyway, that it would be better to have a new design that attaches from the outside of the chassis.
The stock extractor attaches with screws and nuts. I created a small bracket to hold the nuts in place. This is required because the nuts are not accessible when the extractor is in place.
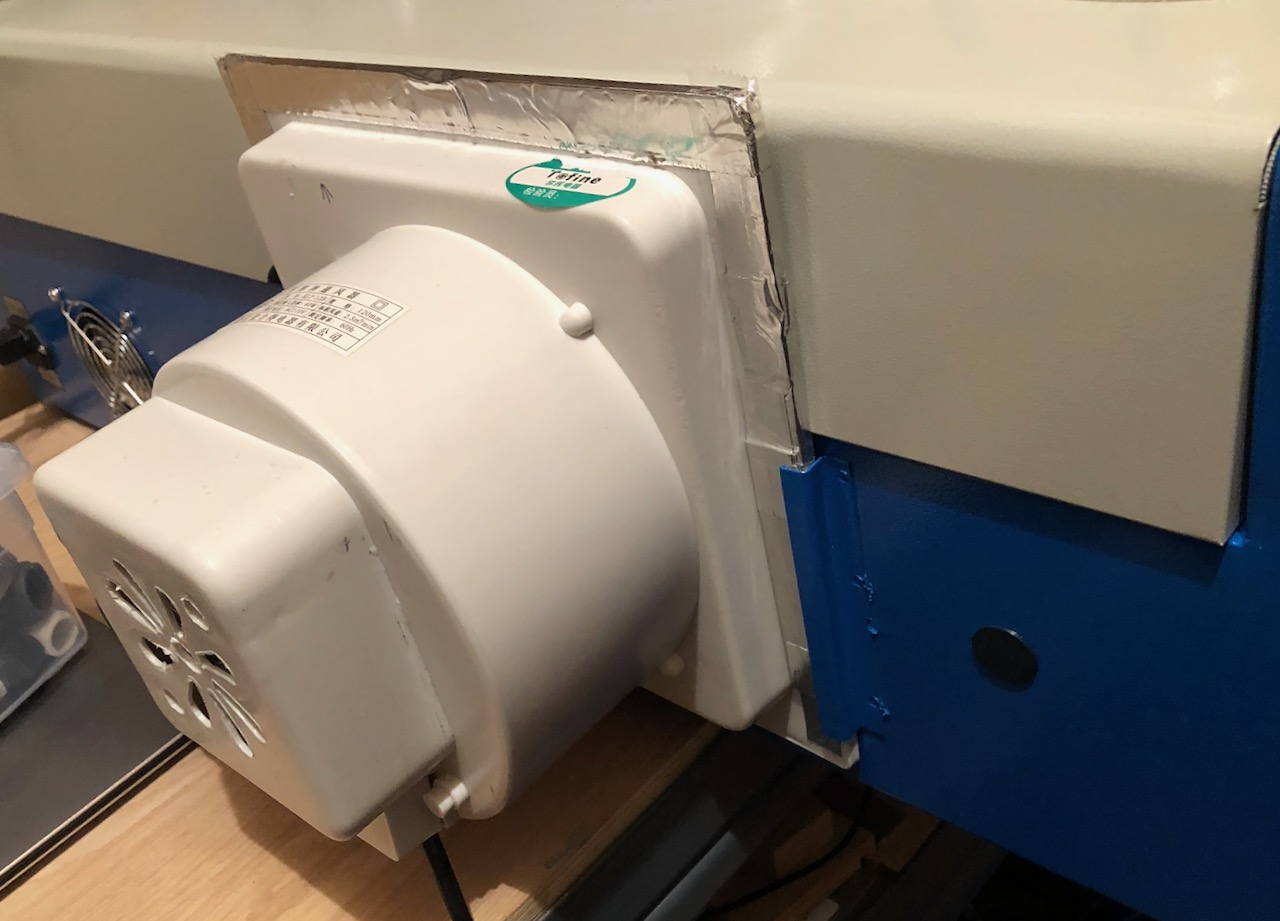
I designed an attachment for the new fume extractor that hooks up a standard shop vacuum hose. This allows me to put the blower outside of the shop area. The profile is smaller with just a hose and it is easier to open the panels on the back. Previously the old blower had to be removed to open the cover panel for the laser.
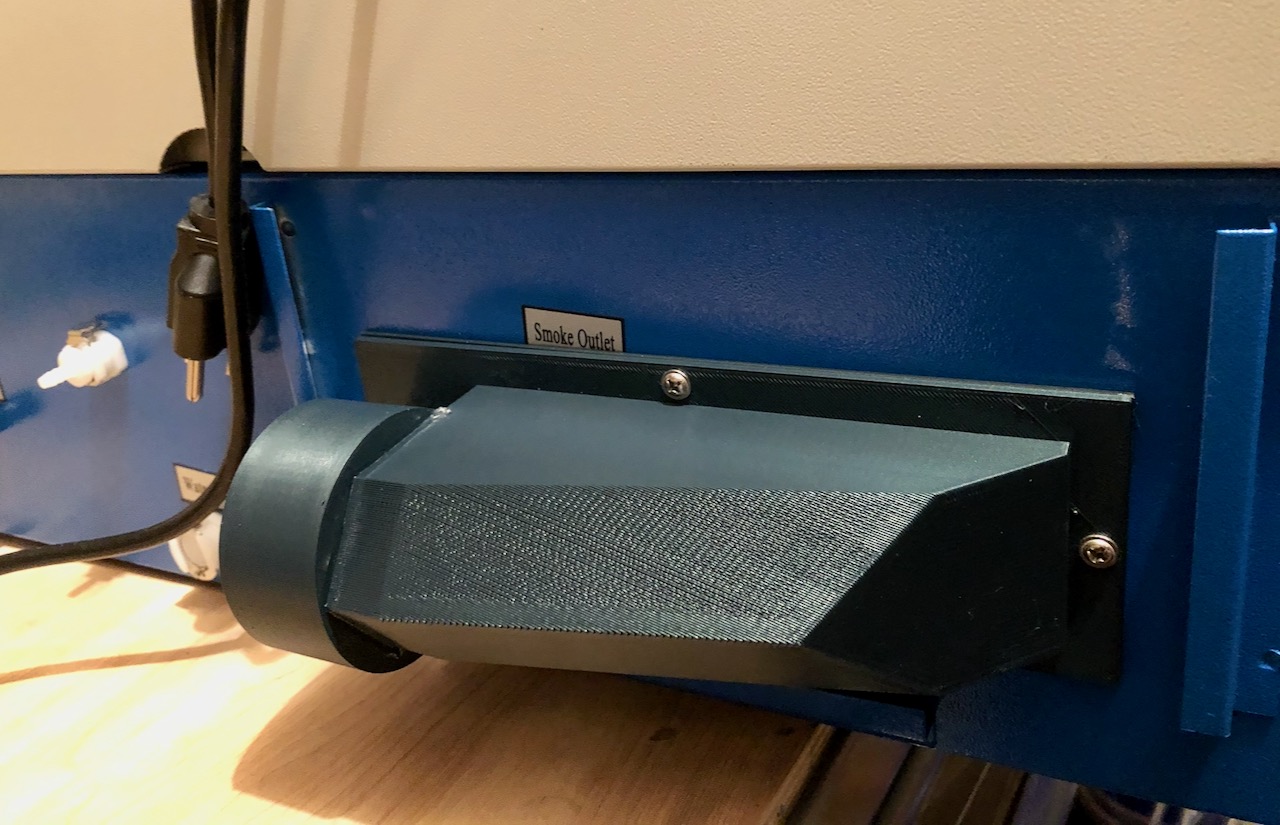
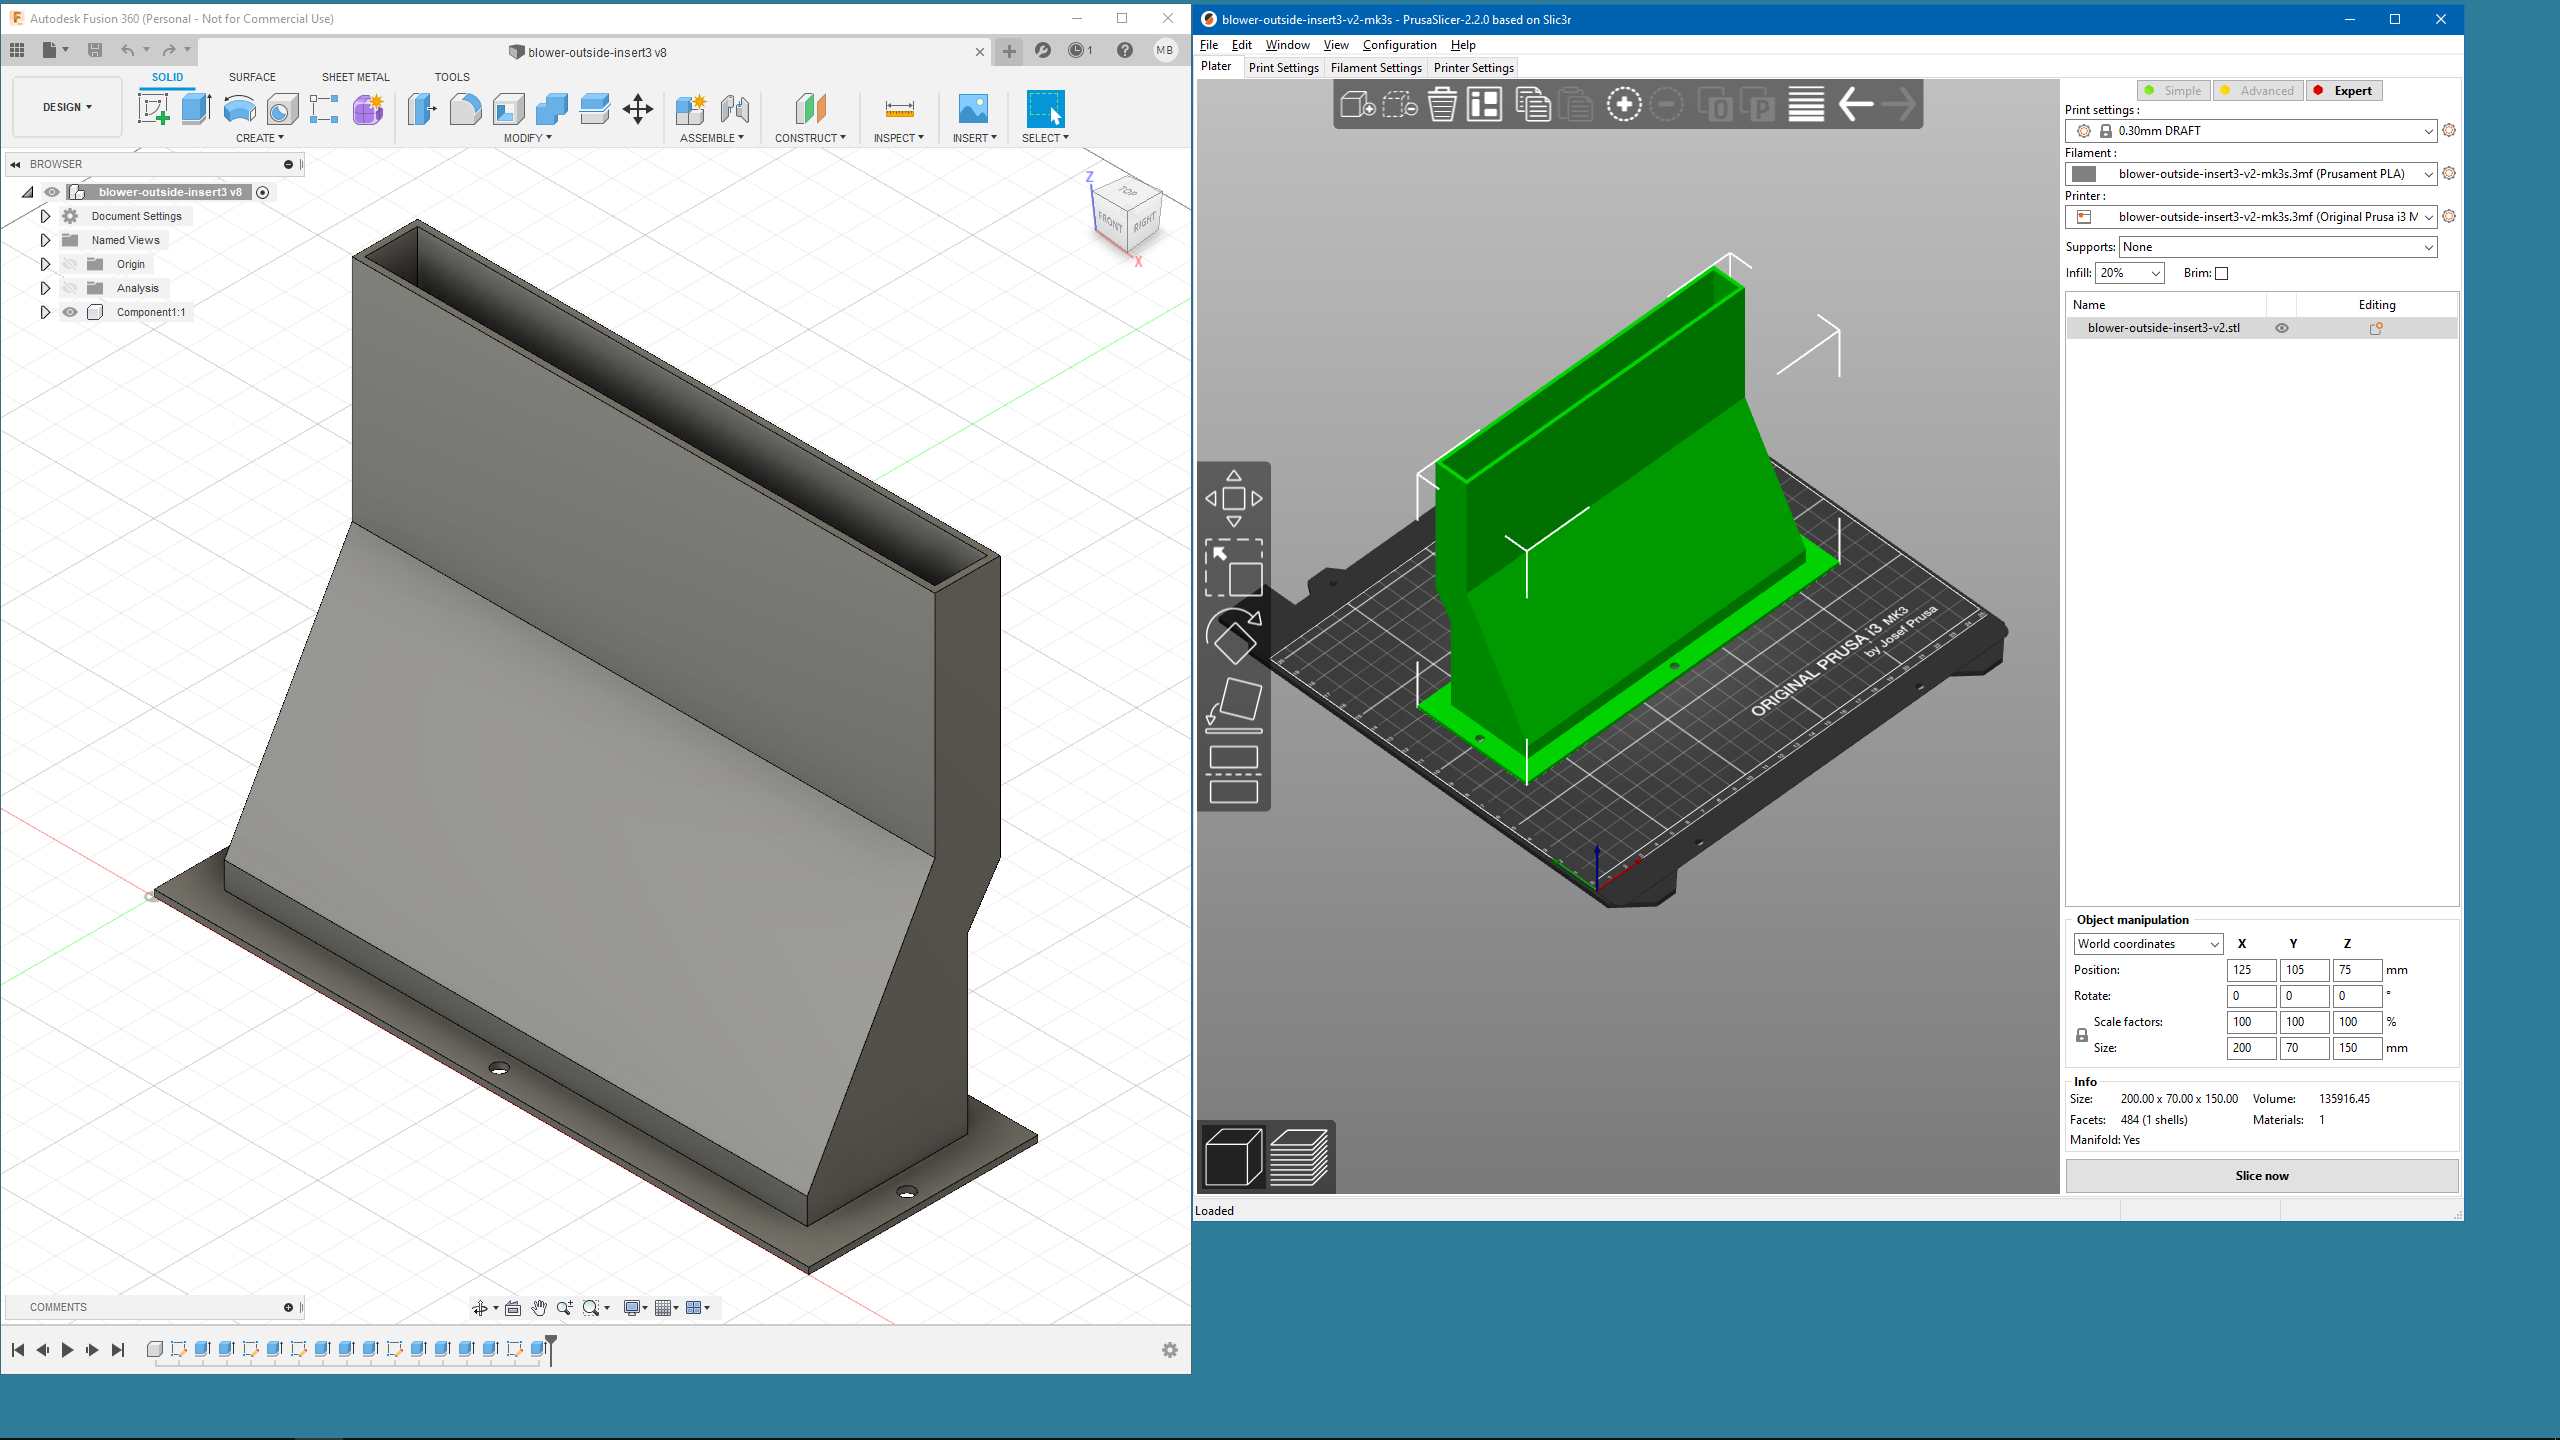
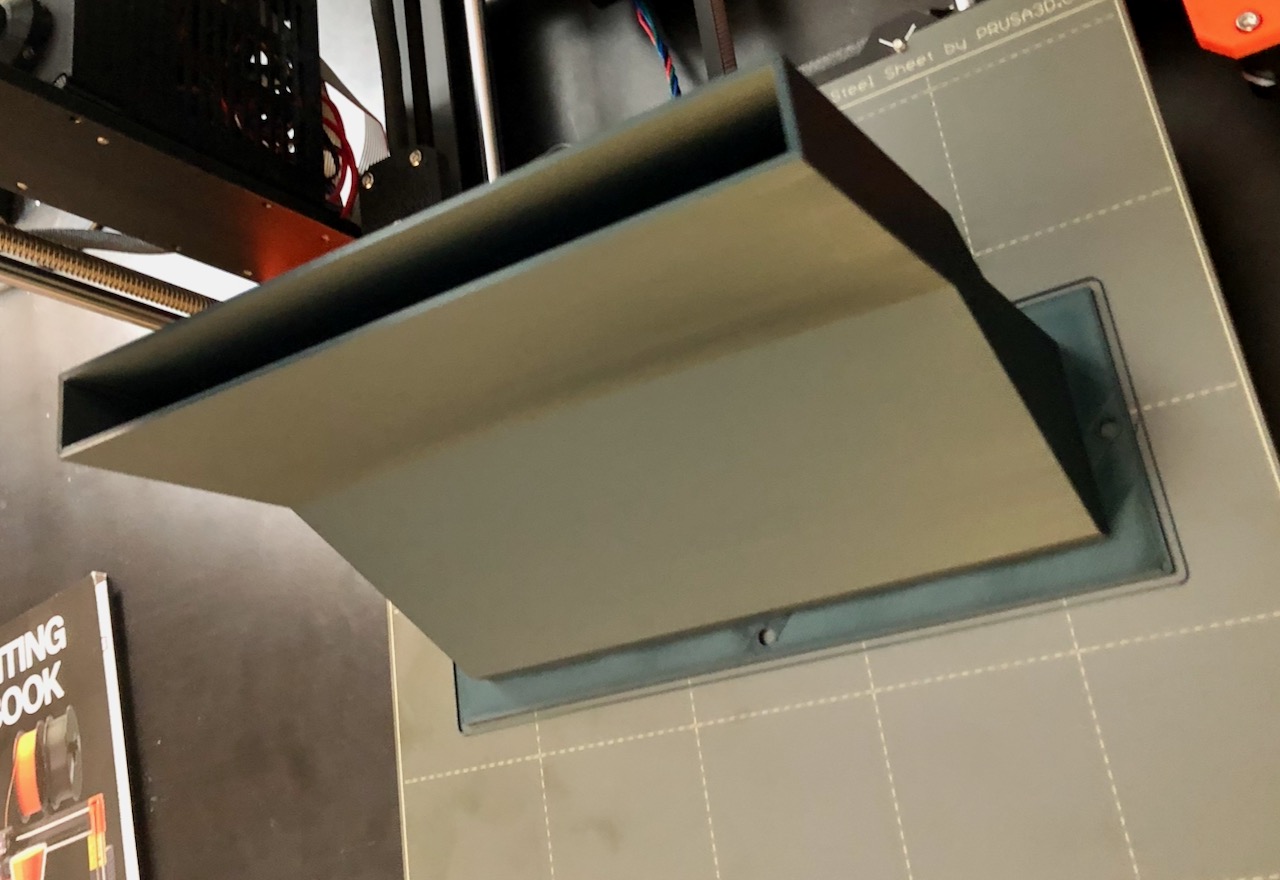
I made an adapter for an external 6” blower to attach the shop vacuum hose. The parts were all designed in Fusion 360 and 3D printed. This allows the use of a much stronger blower as well as the option to have a longer hose to get fumes away from the workshop.
The first blower I purchased was a 4” model. It was more powerful than the original blower, but wasn’t as good as I hoped. I purchased a more powerful 6” model that is excellent at extracting the fumes and smoke.
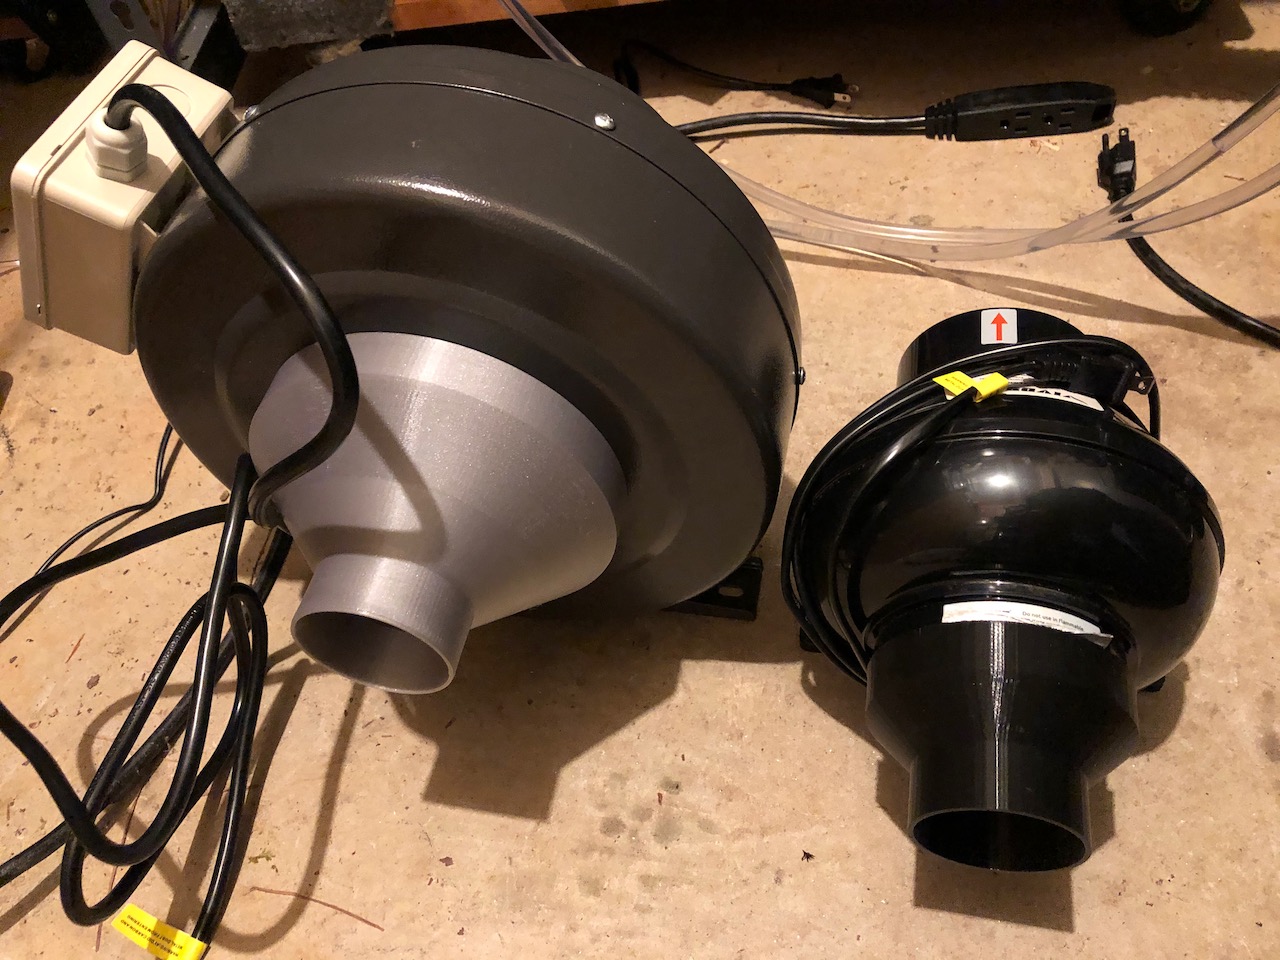
The blowers attach to the back using an adapter on the blower that I designed in Fusion 360 and 3D printed. I have a 20’ shop vac hose that attaches the blower to the K40. I designed and printed this adapter for the shop vac hose. It is significantly better than the original setup.
Water Line Quick Disconnects
The water lines for the stock K40 are just long silicon tubing that runs from the laser tube section, then through two holes inside to the bottom section of the chassis. Then there are just two holes punched in the chassis where the lines go out of the unit. The tuning is long enough to reach a water tank located several feet away.
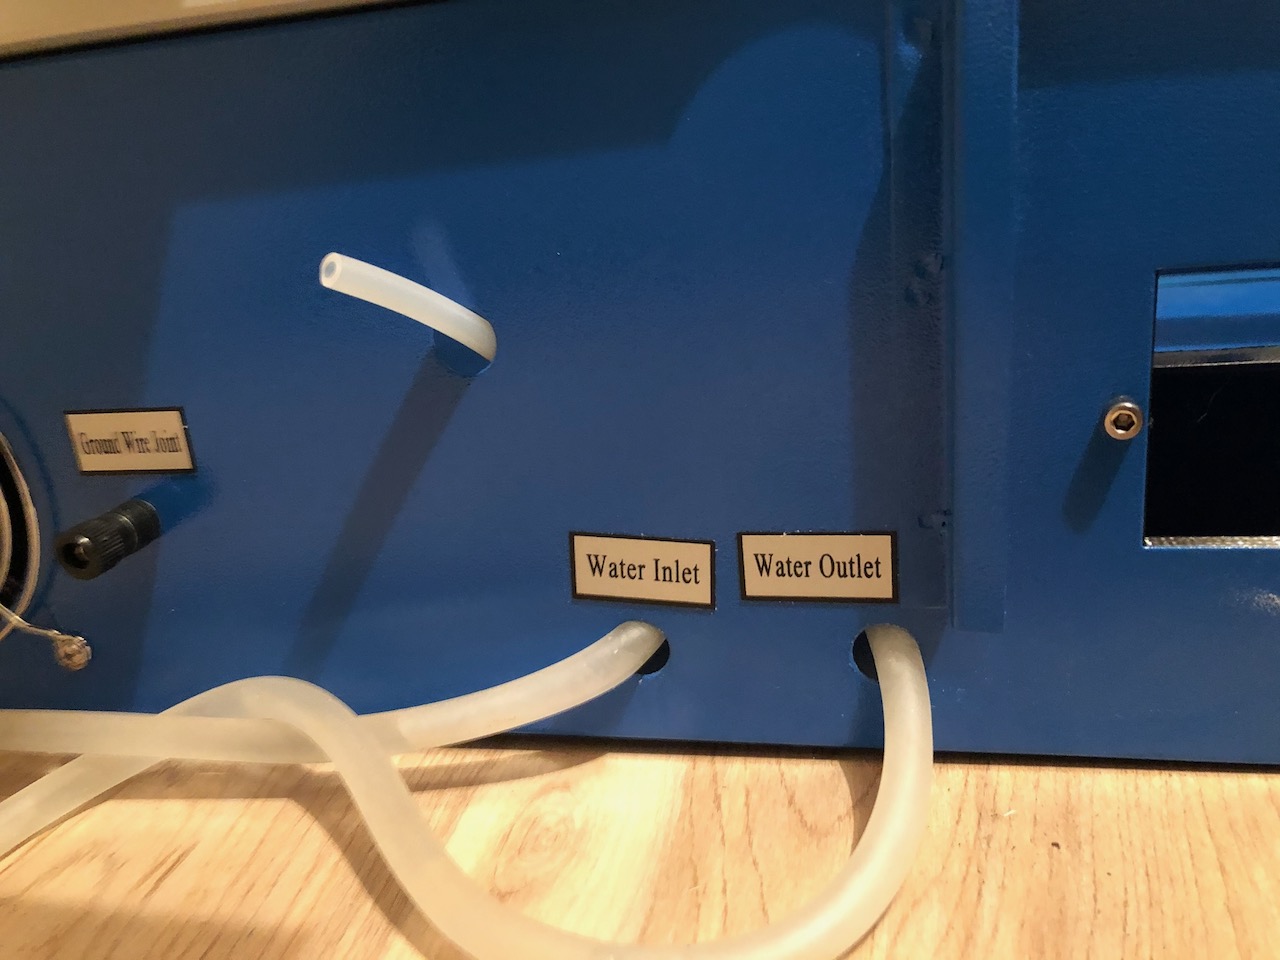
There were a few things about this that were problematic for me. First, the silicon tubing is a magnet for dirt. Anything that gets on them is difficult to clean off. Second, the silicon tubing tends to get slimy in the water tank. But the main reason is that I wanted to have something more portable. I also have a CNC router that uses water cooling. I thought it would be good to have one cooling tank for both since I’m not likely to use both at the same time.
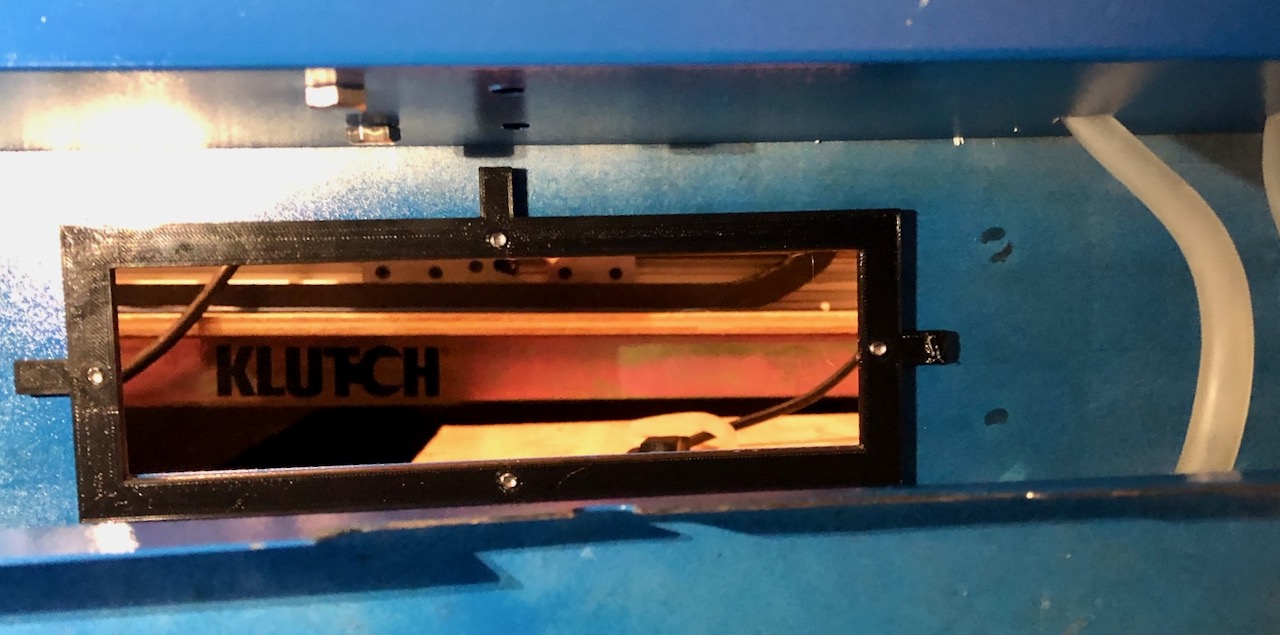
I purchased quick disconnects so that I could easily detach the water lines when I move the K40 or when I am not using it. The disconnects are valved so that the water doesn’t have to be drained before disconnecting the water lines. Since the K40 is setup temporarily due to limited space, it allows moving it when not in use.

The smaller air line connector is a Colder Products PMC model. The water line connectors are PLC model.
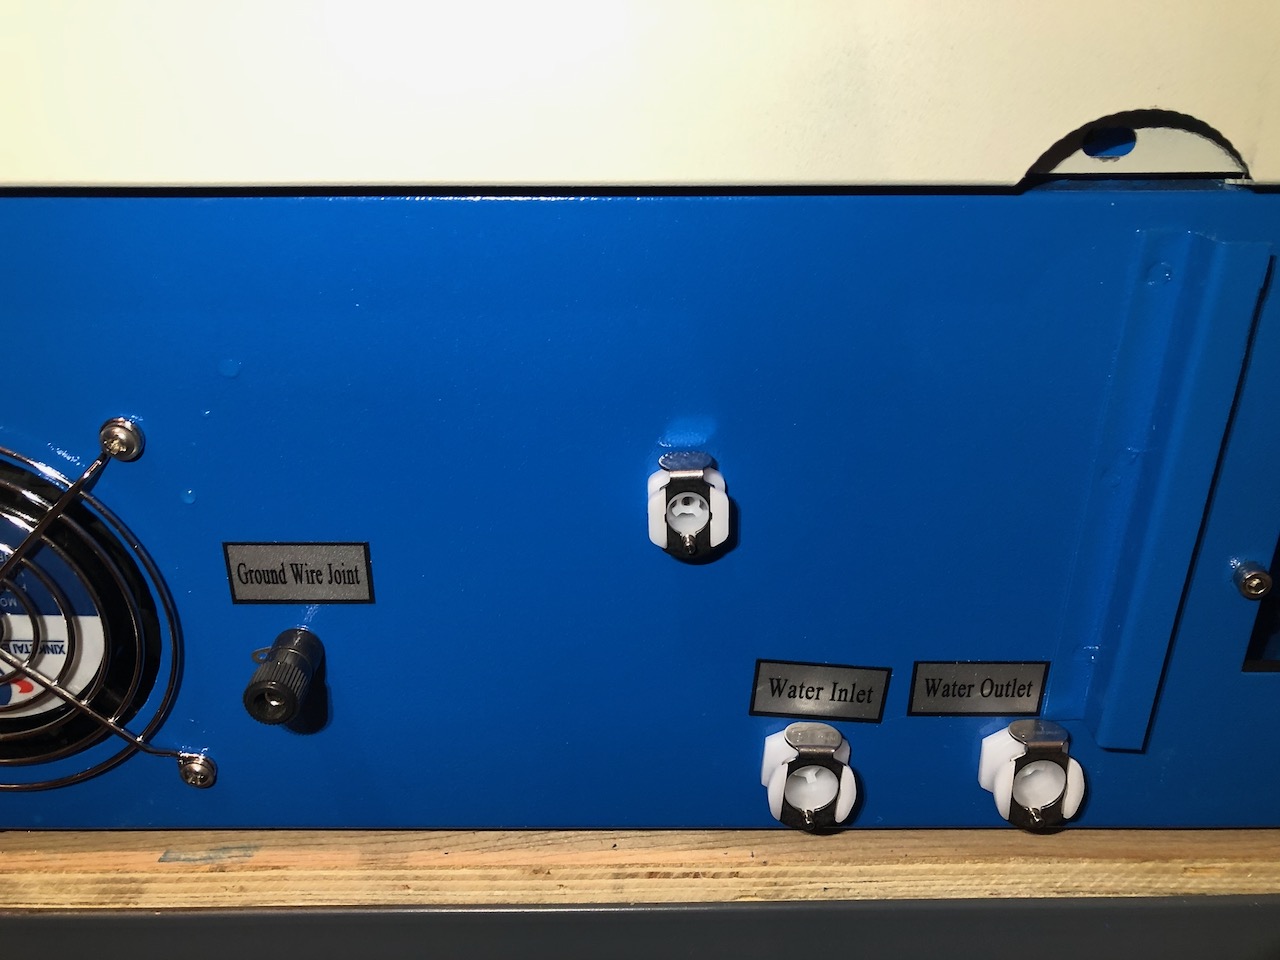
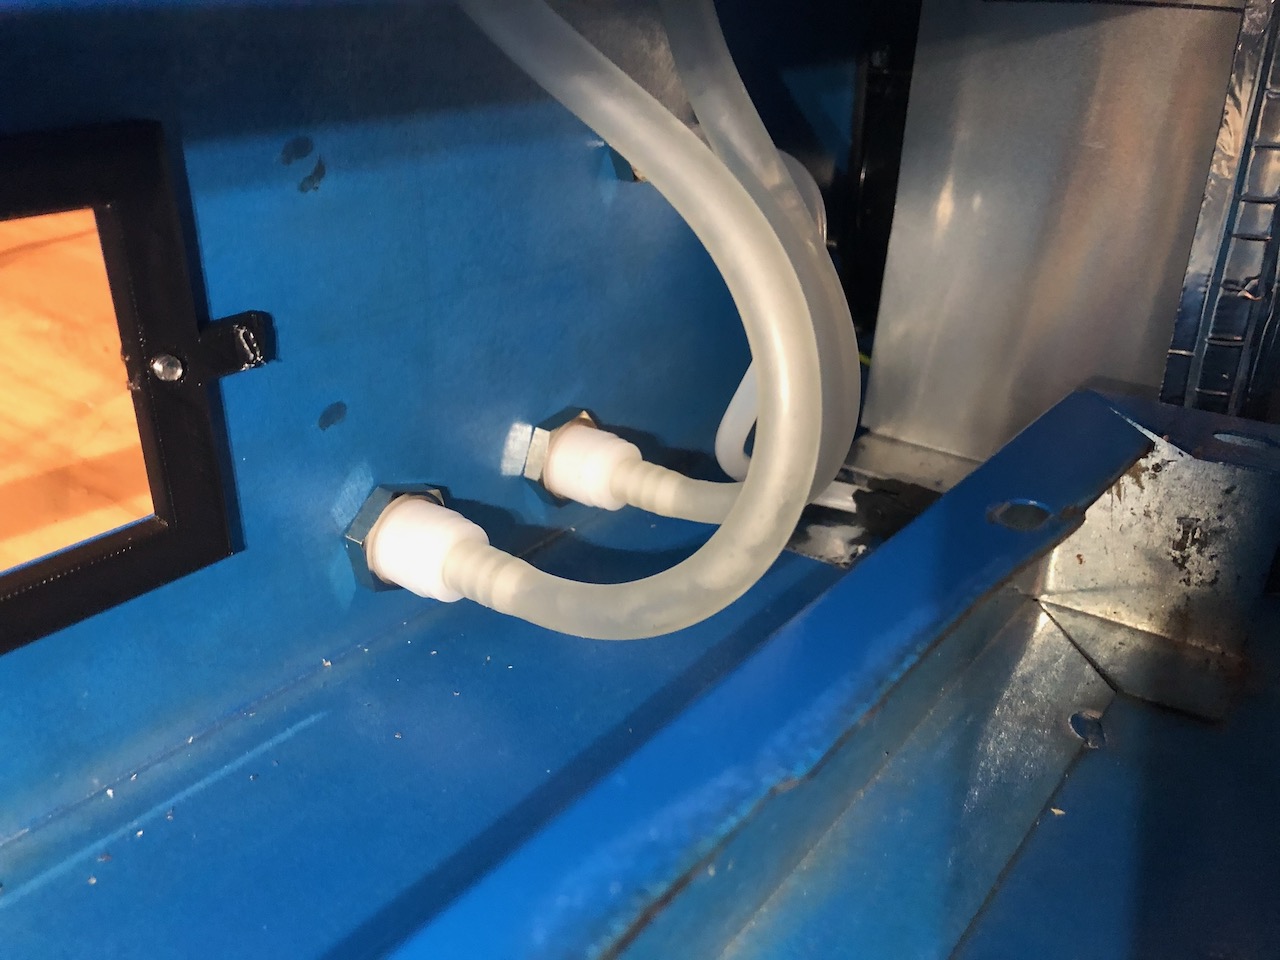
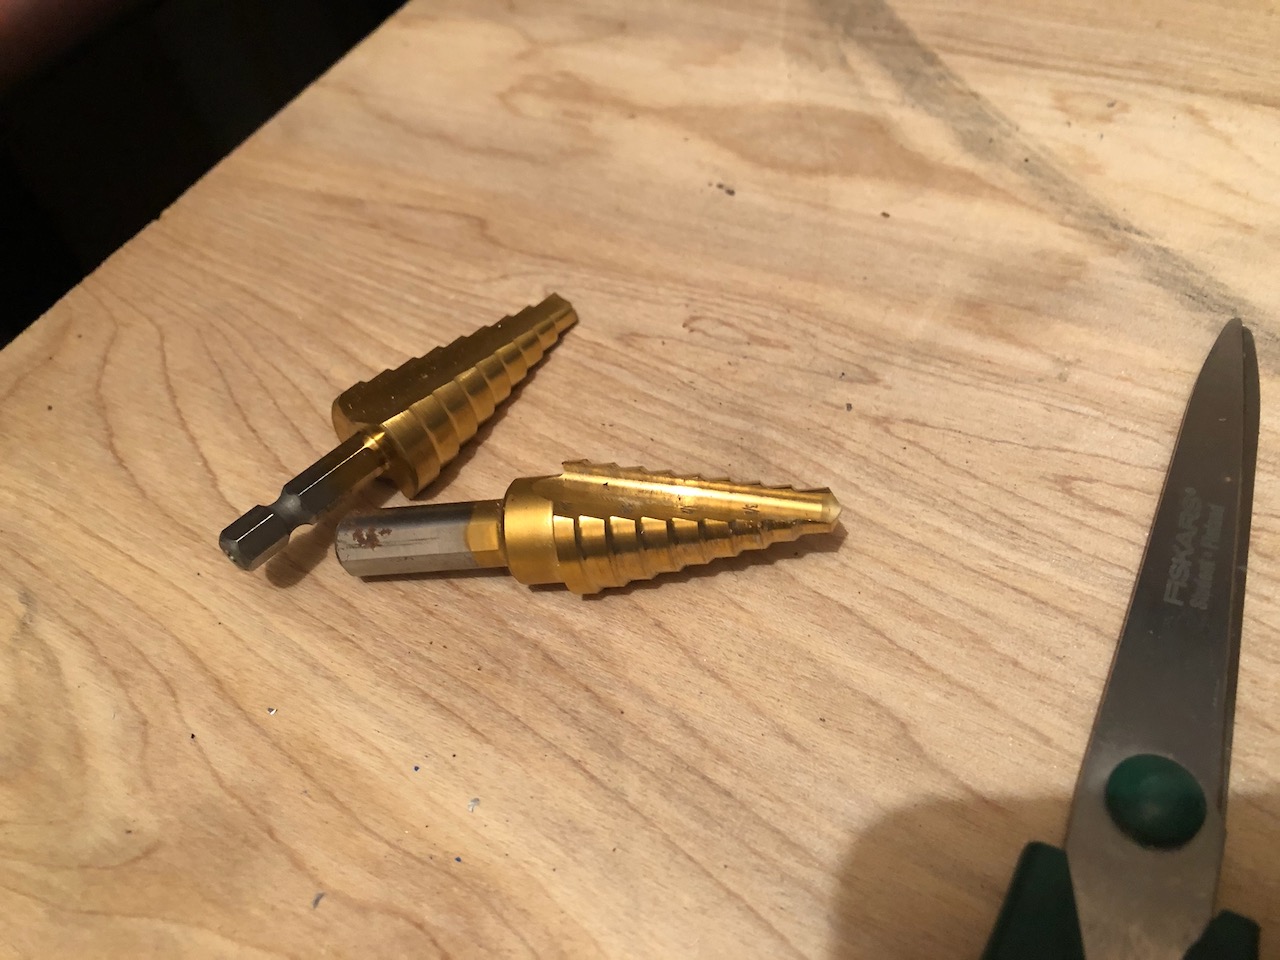
I used a step bit in a cordless drill to increase the size of the holes for the water lines. The quick disconnect housings I used for the water lines were larger than the stock holes. The line for the air assist quick disconnect was OK and didn’t need to be modified.
Focus Lens and Mirrors
The K40 has 3 mirrors and 1 focus lens. The stock mirrors on my machine had some spots on them. They are made of molybdenum (MO). Since I needed to replace the ones with defects I decided to replace them with the gold plated reflection mirror. There was one other option of using the higher quality Si plated mirrors. But I opted for the gold plated because the price and function seemed good enough for the K40.
For the focus lens I bought a high quality ZnSe lens.
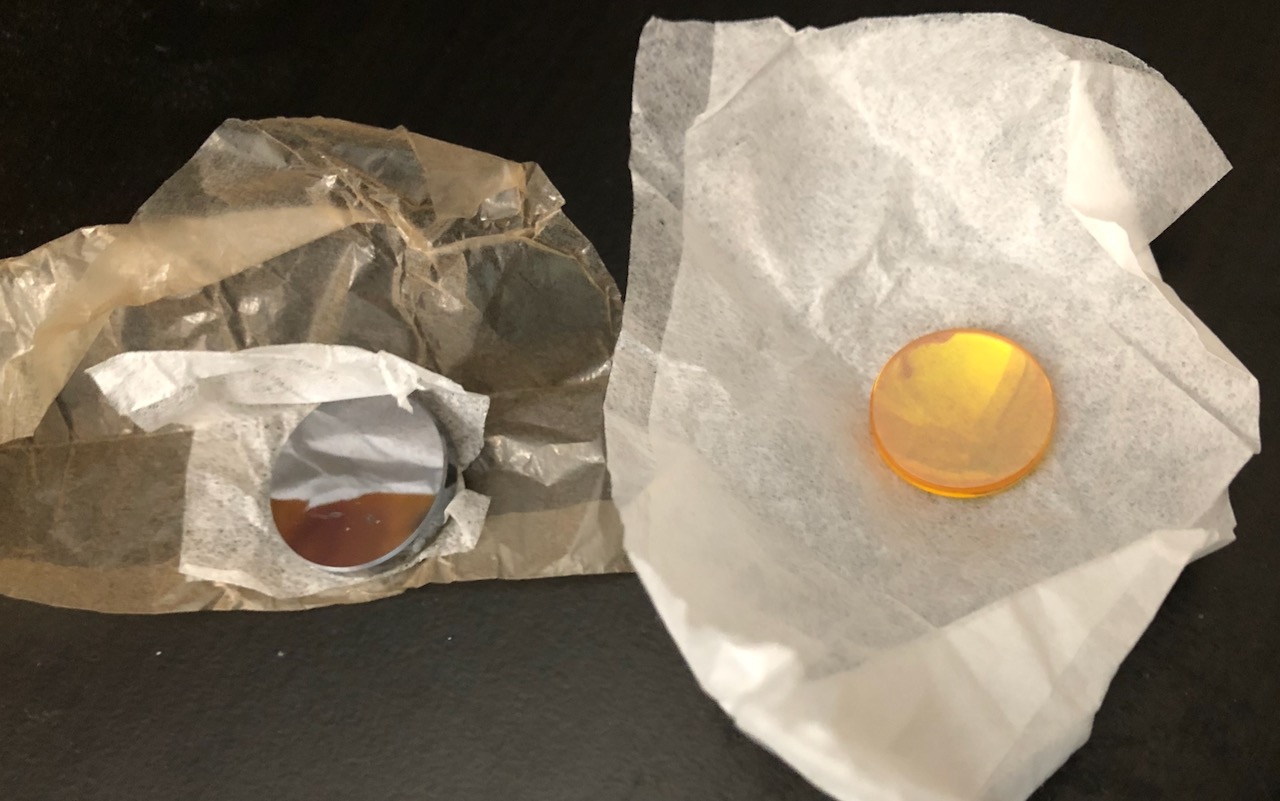
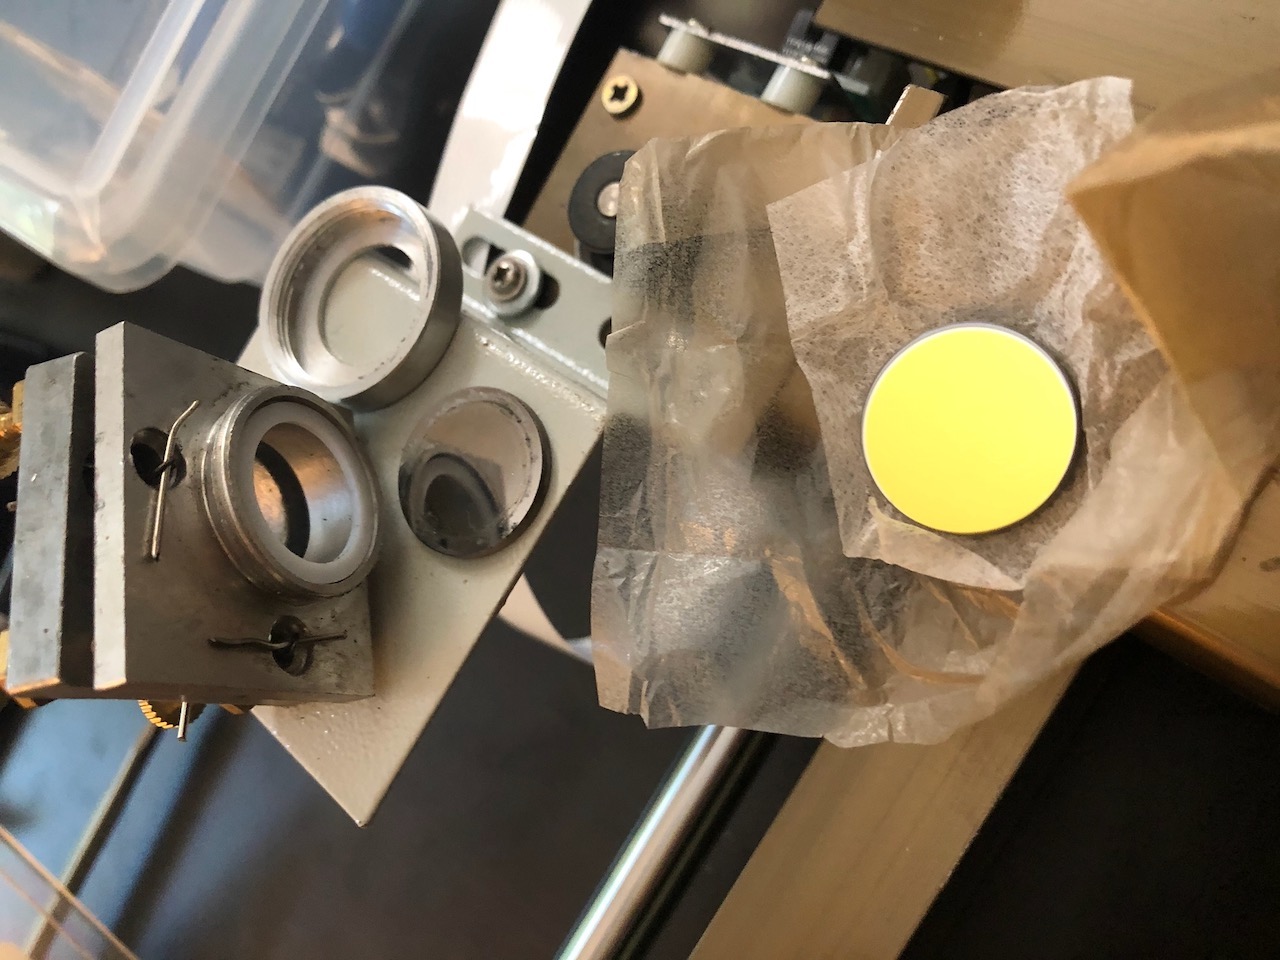
The mirrors are 20mm and the focus lens is 12mm. Just note that if you purchase a new focus lens holder that has the integrated air assist nozzle it could be a different diameter. It is best to measure first.
It is important to know that there are different focal lengths for the focus lens. Make sure you get the one that is correct for your machine. The stock K40 uses 50.8mm or 2.0″ focal length.
The focus lens must be installed in a specific direction. One side is flat and the other side is curved (Plano convex). There are also meniscus lenses that are curved on both sides. The next focus lens I purchase will be a better quality meniscus lens.
These are examples of the style I am using: (affiliate links)
3PCS Si Mirror Coated Gold Dia:20mm for CO2 Laser
ZnSe Focus Lens Dia:12mm FL:2” or 50.8mm for CO2 Laser Engraving Cutting
Sealing up the K40 Chassis
For most of the holes in the chassis I used an aluminum sealing tape. I already had some and I have used it on other projects. It adheres very well and is very strong. Duct tape would also work and would be lower priced.
I made a new internal panel that separates the electronics section from the laser gantry section. It wasn’t planned originally, but with the drag chain for the air assist I needed just a little more space for it to move freely. The solution was to make a new panel that mounted to the same holes but had the bottom flange on the opposite side. Using the existing panel as a reference I 3D printed two plastic panels that lined up with the existing mounting holes. Then I used aluminum flashing to make a solid panel.
I also decided to 3D print a plastic plug for the extra hole on the back of the chassis.
There is an upper slot that is open at the top where the doors mount above the internal separation panel. To restrict airflow there I created a small #d printed plastic part that attaches with magnets. It closes some of the gap. Another option would be to use the foam window sealant strips.
Overall there are a lot of holes and many are not used. Most of the screw holes are easily covered with the aluminum tape. There is a larger hole in the bottom of the chassis. I assume it is a vent to allow air to be drawn in. But with the air assist I think it’s not needed anymore. I covered it with a small aluminum sheet.
Before sealing the machine the fumes filled the room even with the blower pulling air out. Now that it is sealed the fumes are being removed by the blower.
Resources
Fresh Water Systems quick disconnects sells the Colder Products Company line of disconnects